
Intro
In order to install Zoom Engage on your website you will have to add a short code snippet to all the website pages. You can do it with your CMS (Content Management System) - Shopify, Wix, Weebly, Wordpress, Magento (Adobe Commerce), Joomla, Umbraco, Drupal, WooCommerce, BigCommerce, Salesforce Commerce Cloud, Hubspot CMS, Duda, and any other CMS that allows you to add custom HTML code to your pages. Or you can do it with a Tag Manager such as Google Tag Manager (GTM).
In this guide you will get step-by-step instructions on how to add Zoom Engage's code snippet to your website using GTM.
Getting Started
Log into your GTM account, make sure it is the account that is installed on the website you want to track events on. You can use Google Tag Assistant chrome extension to help you with that. After you are sure you are logged into the correct GTM, move on to the following steps.
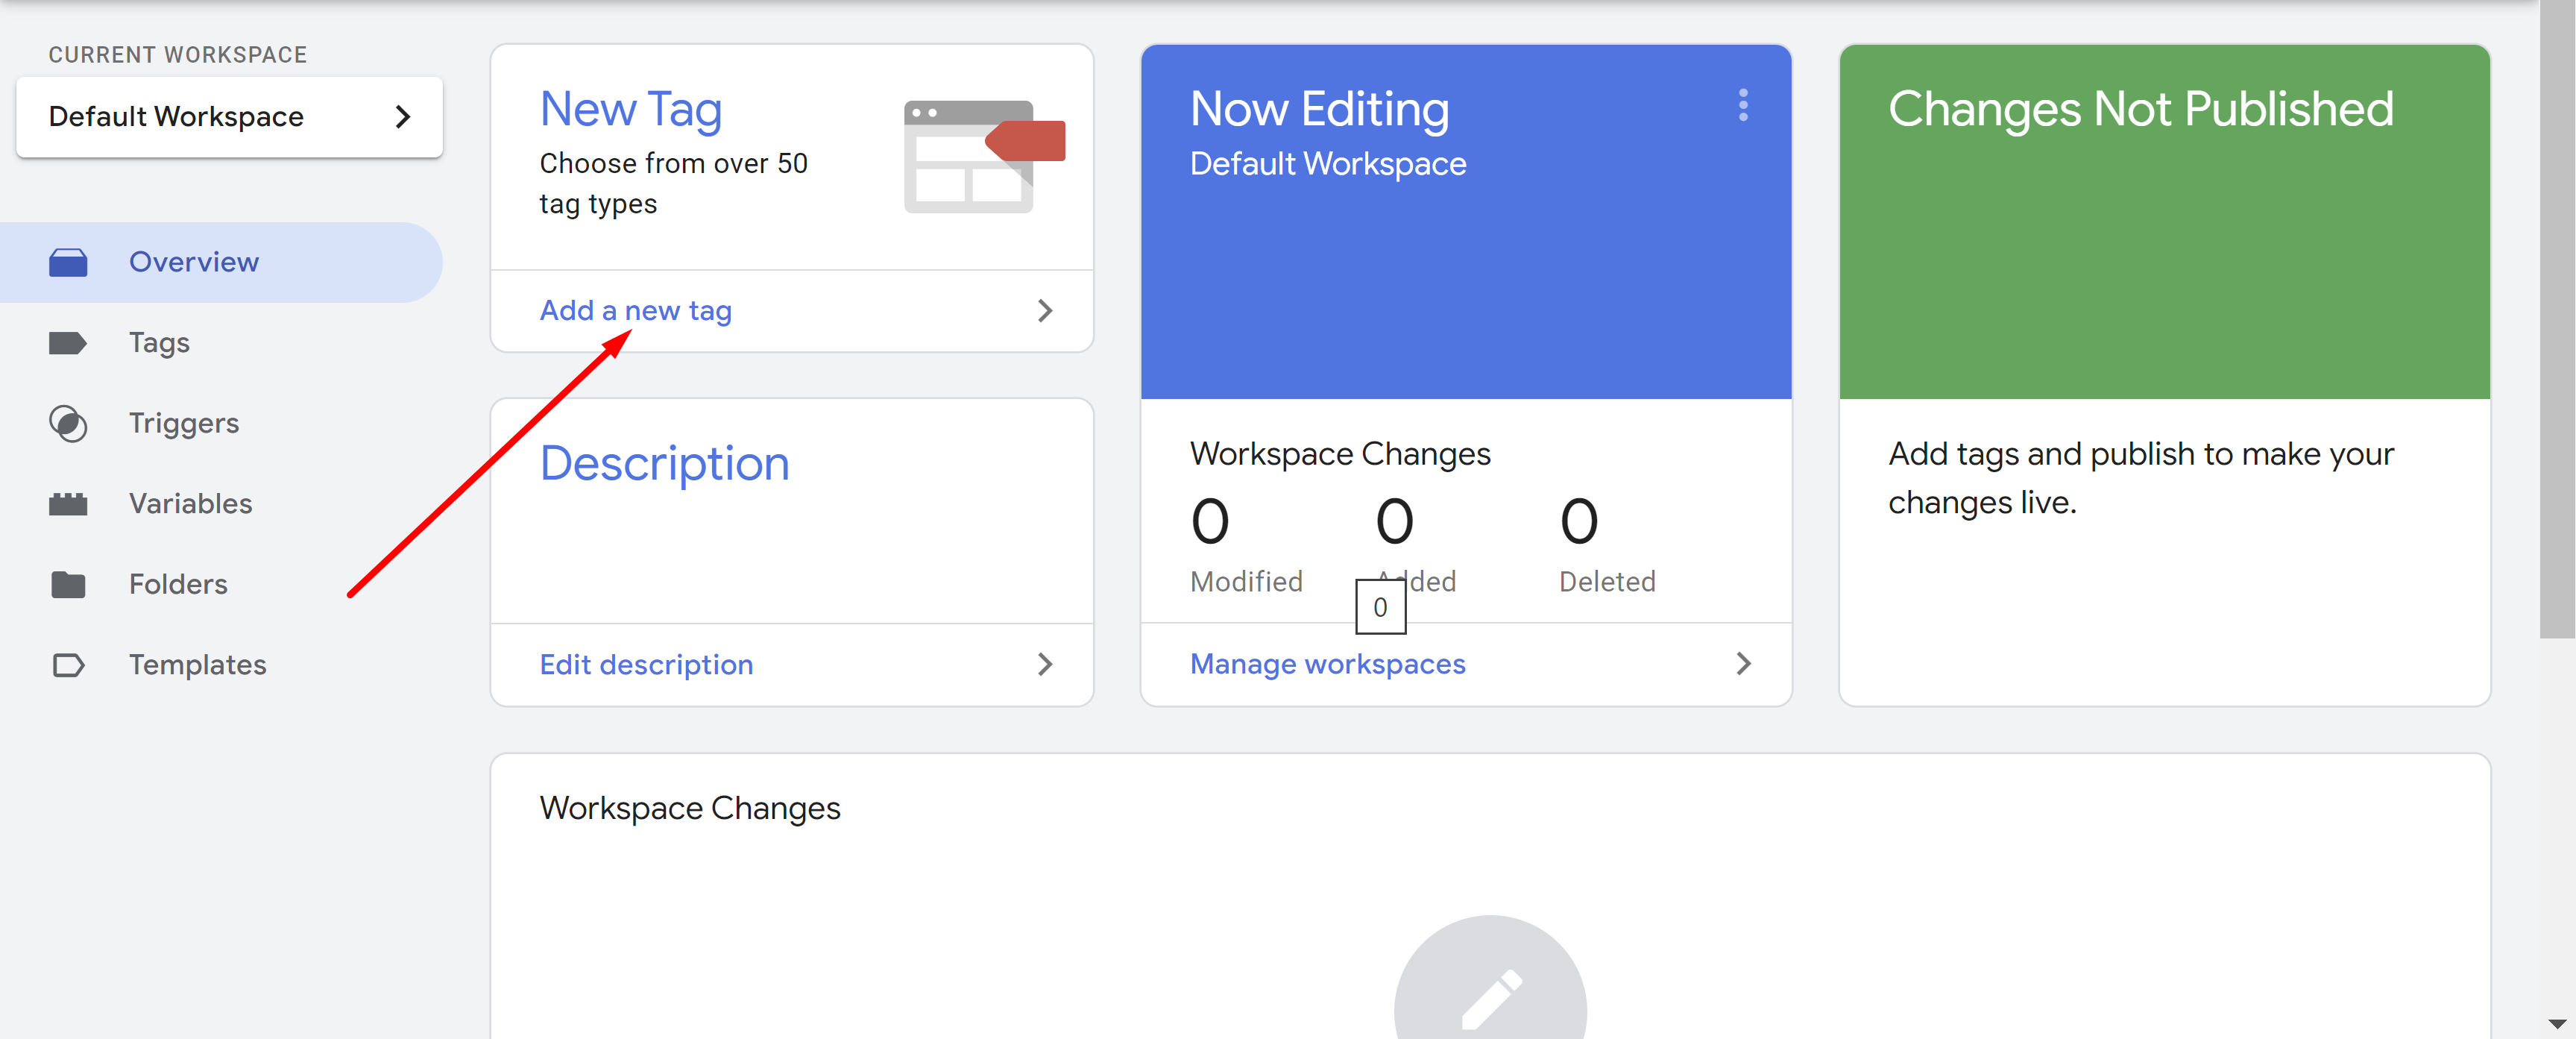
Create a New Tag To Trigger On All Pages
Click on "Add a new tag":
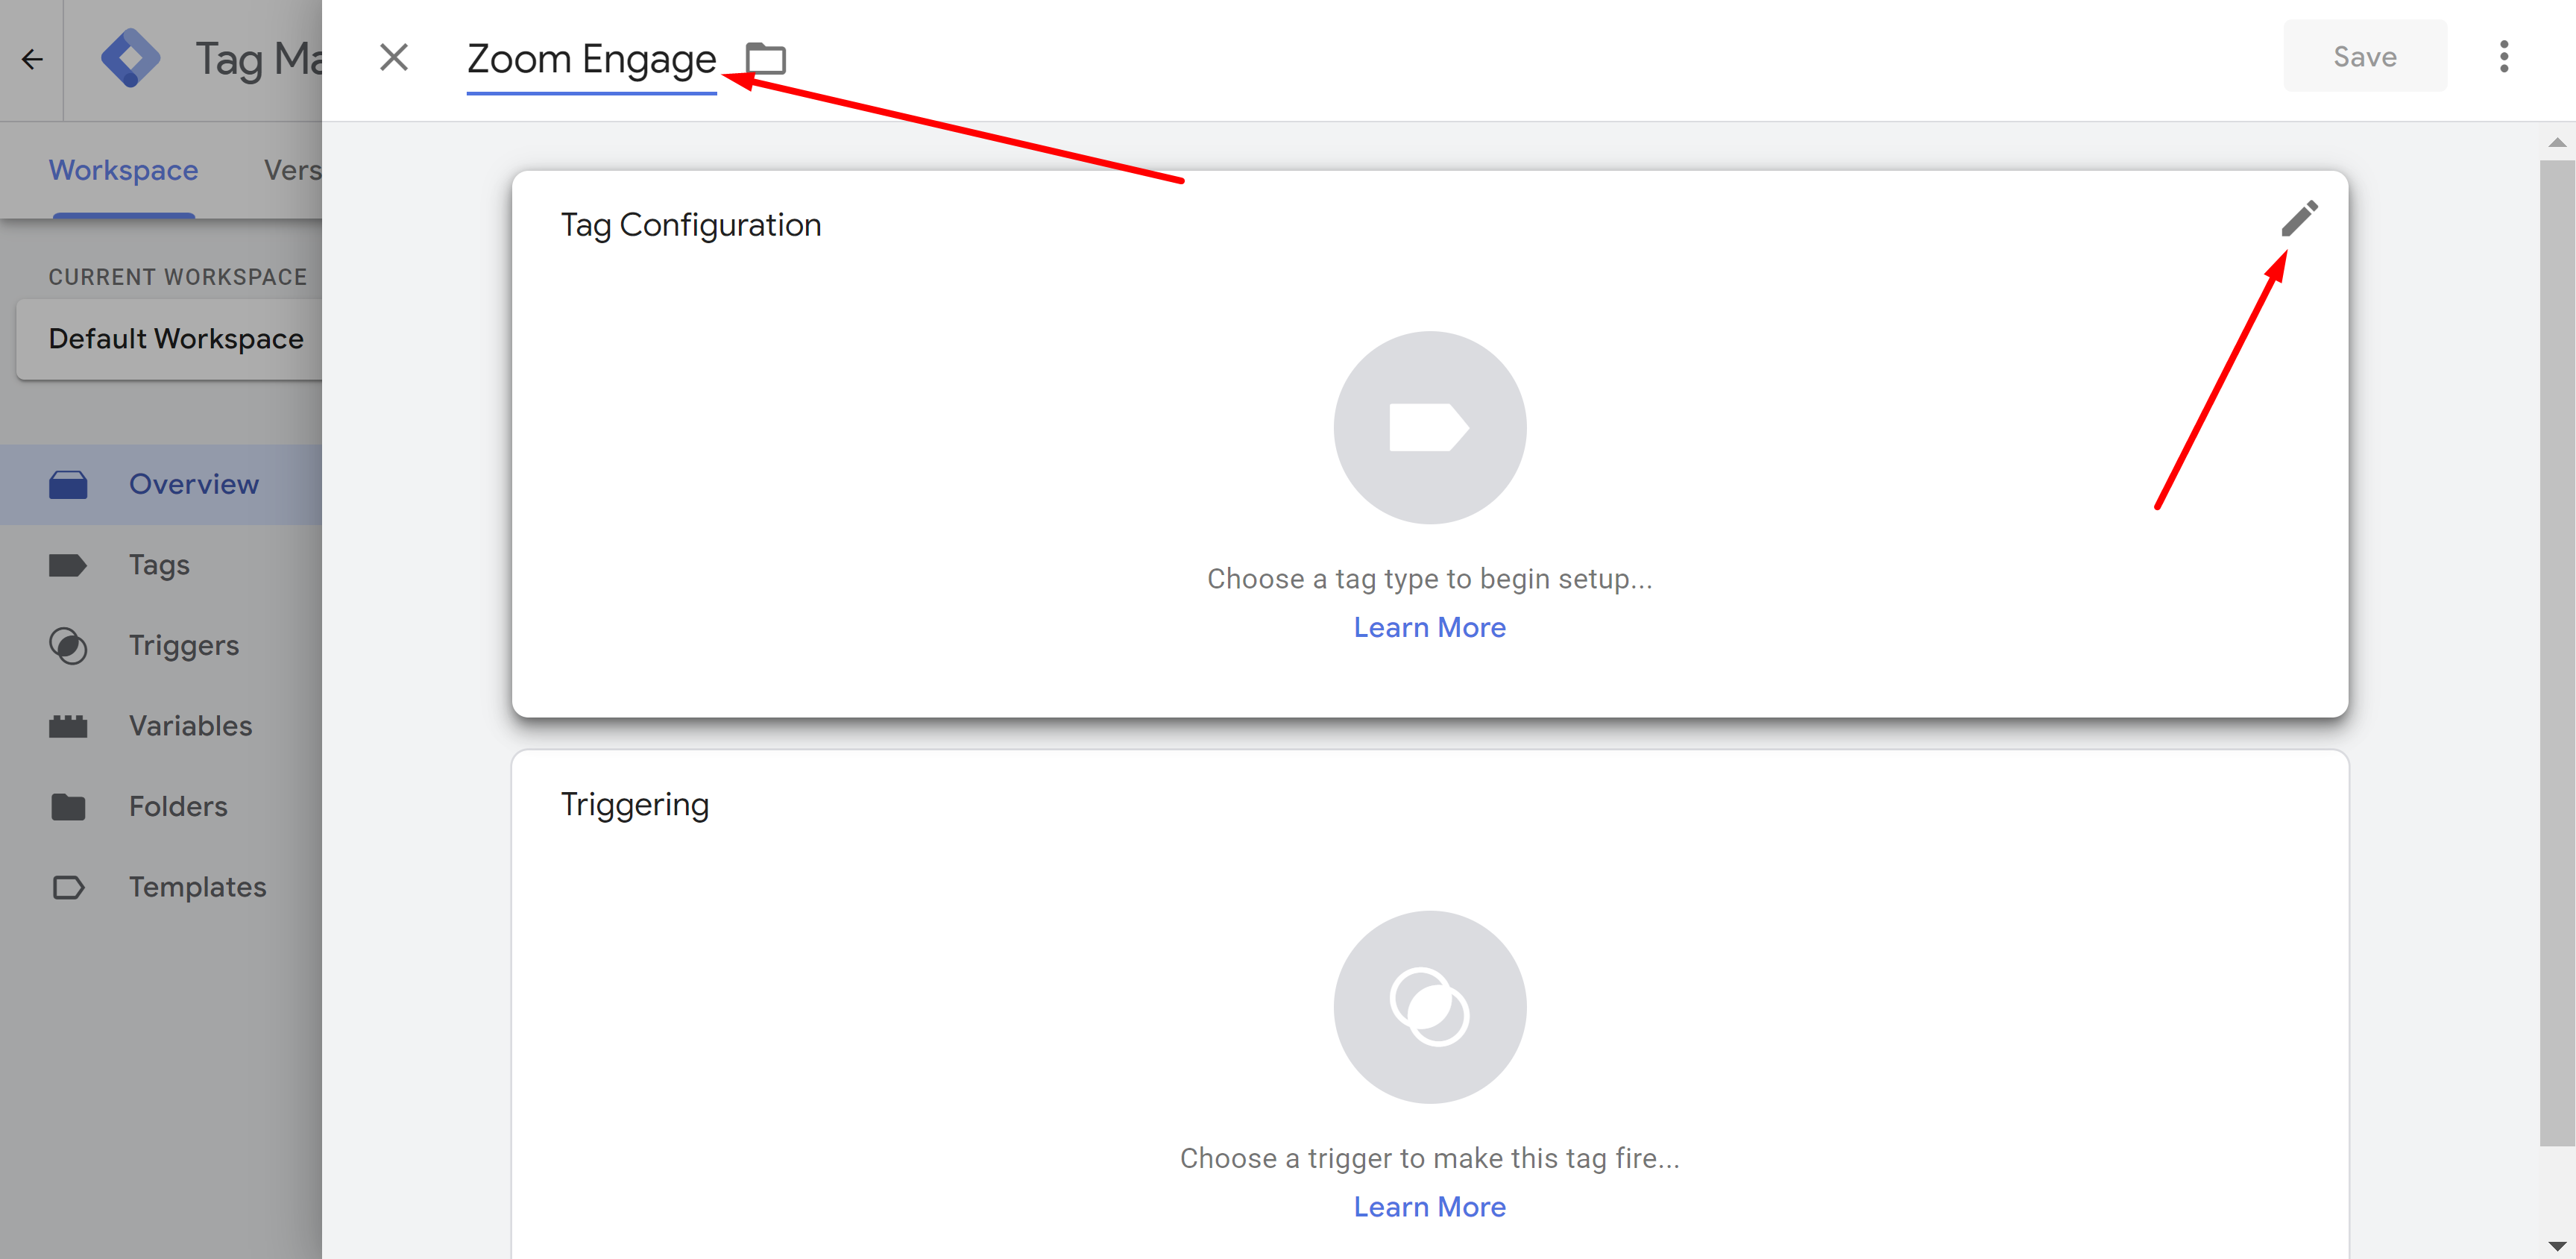
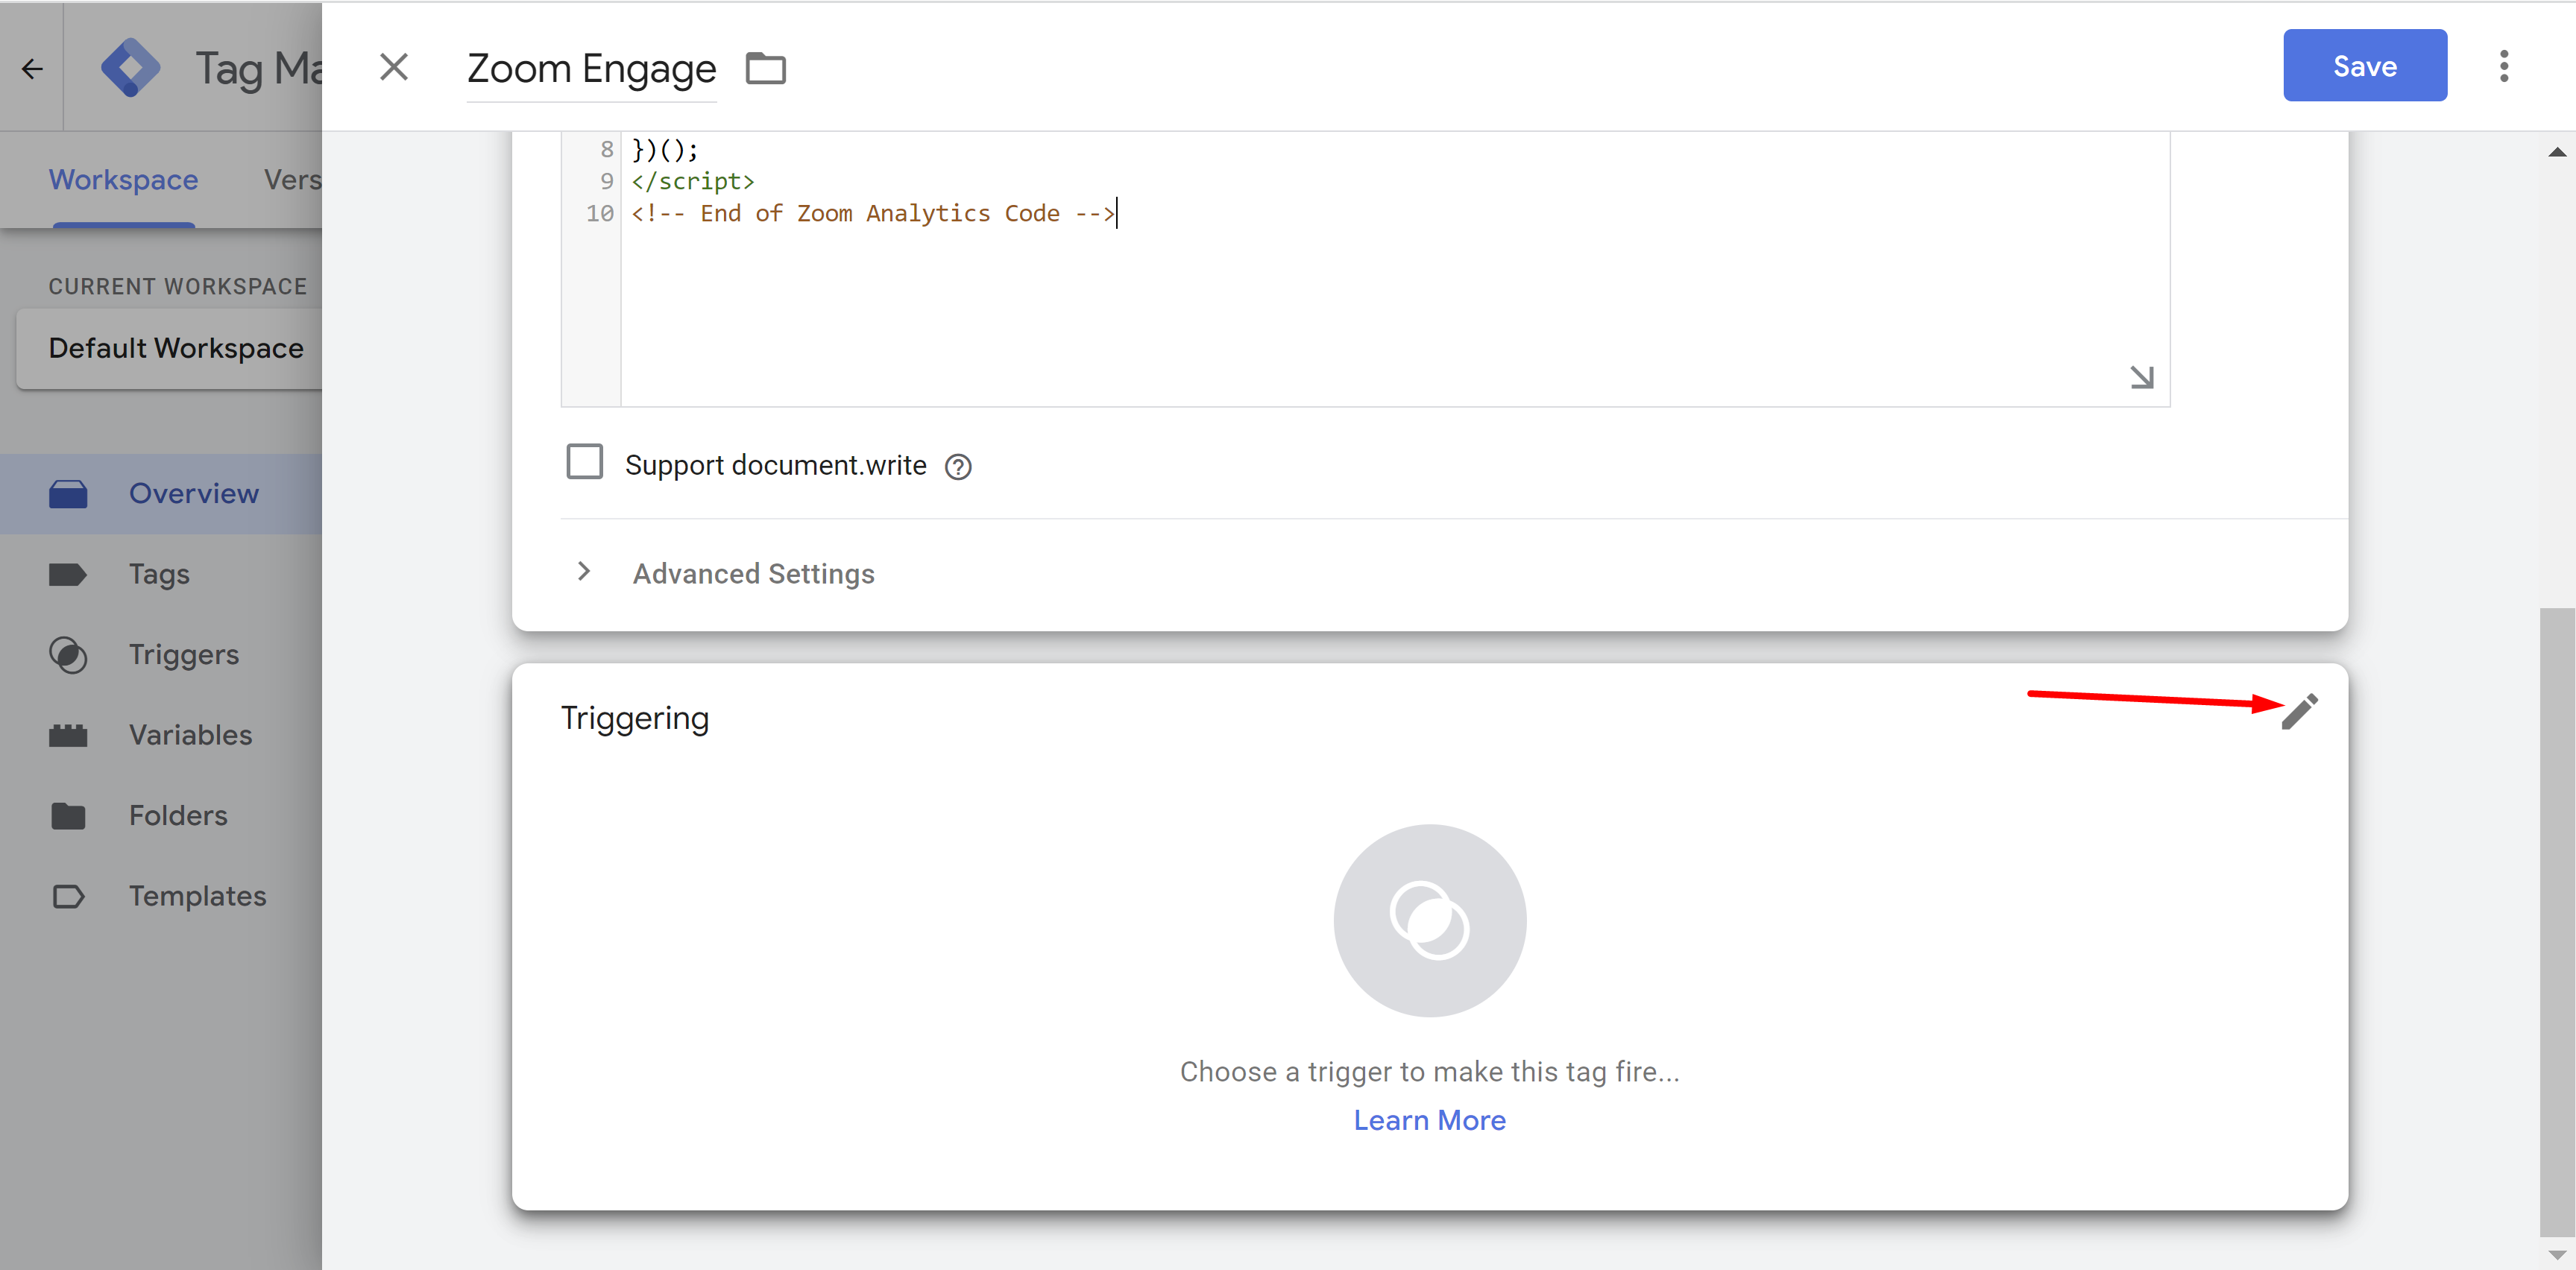
Give the tag a name (e.g. "Zoom Engage") and click on the "Tag Configuration" Pencil:
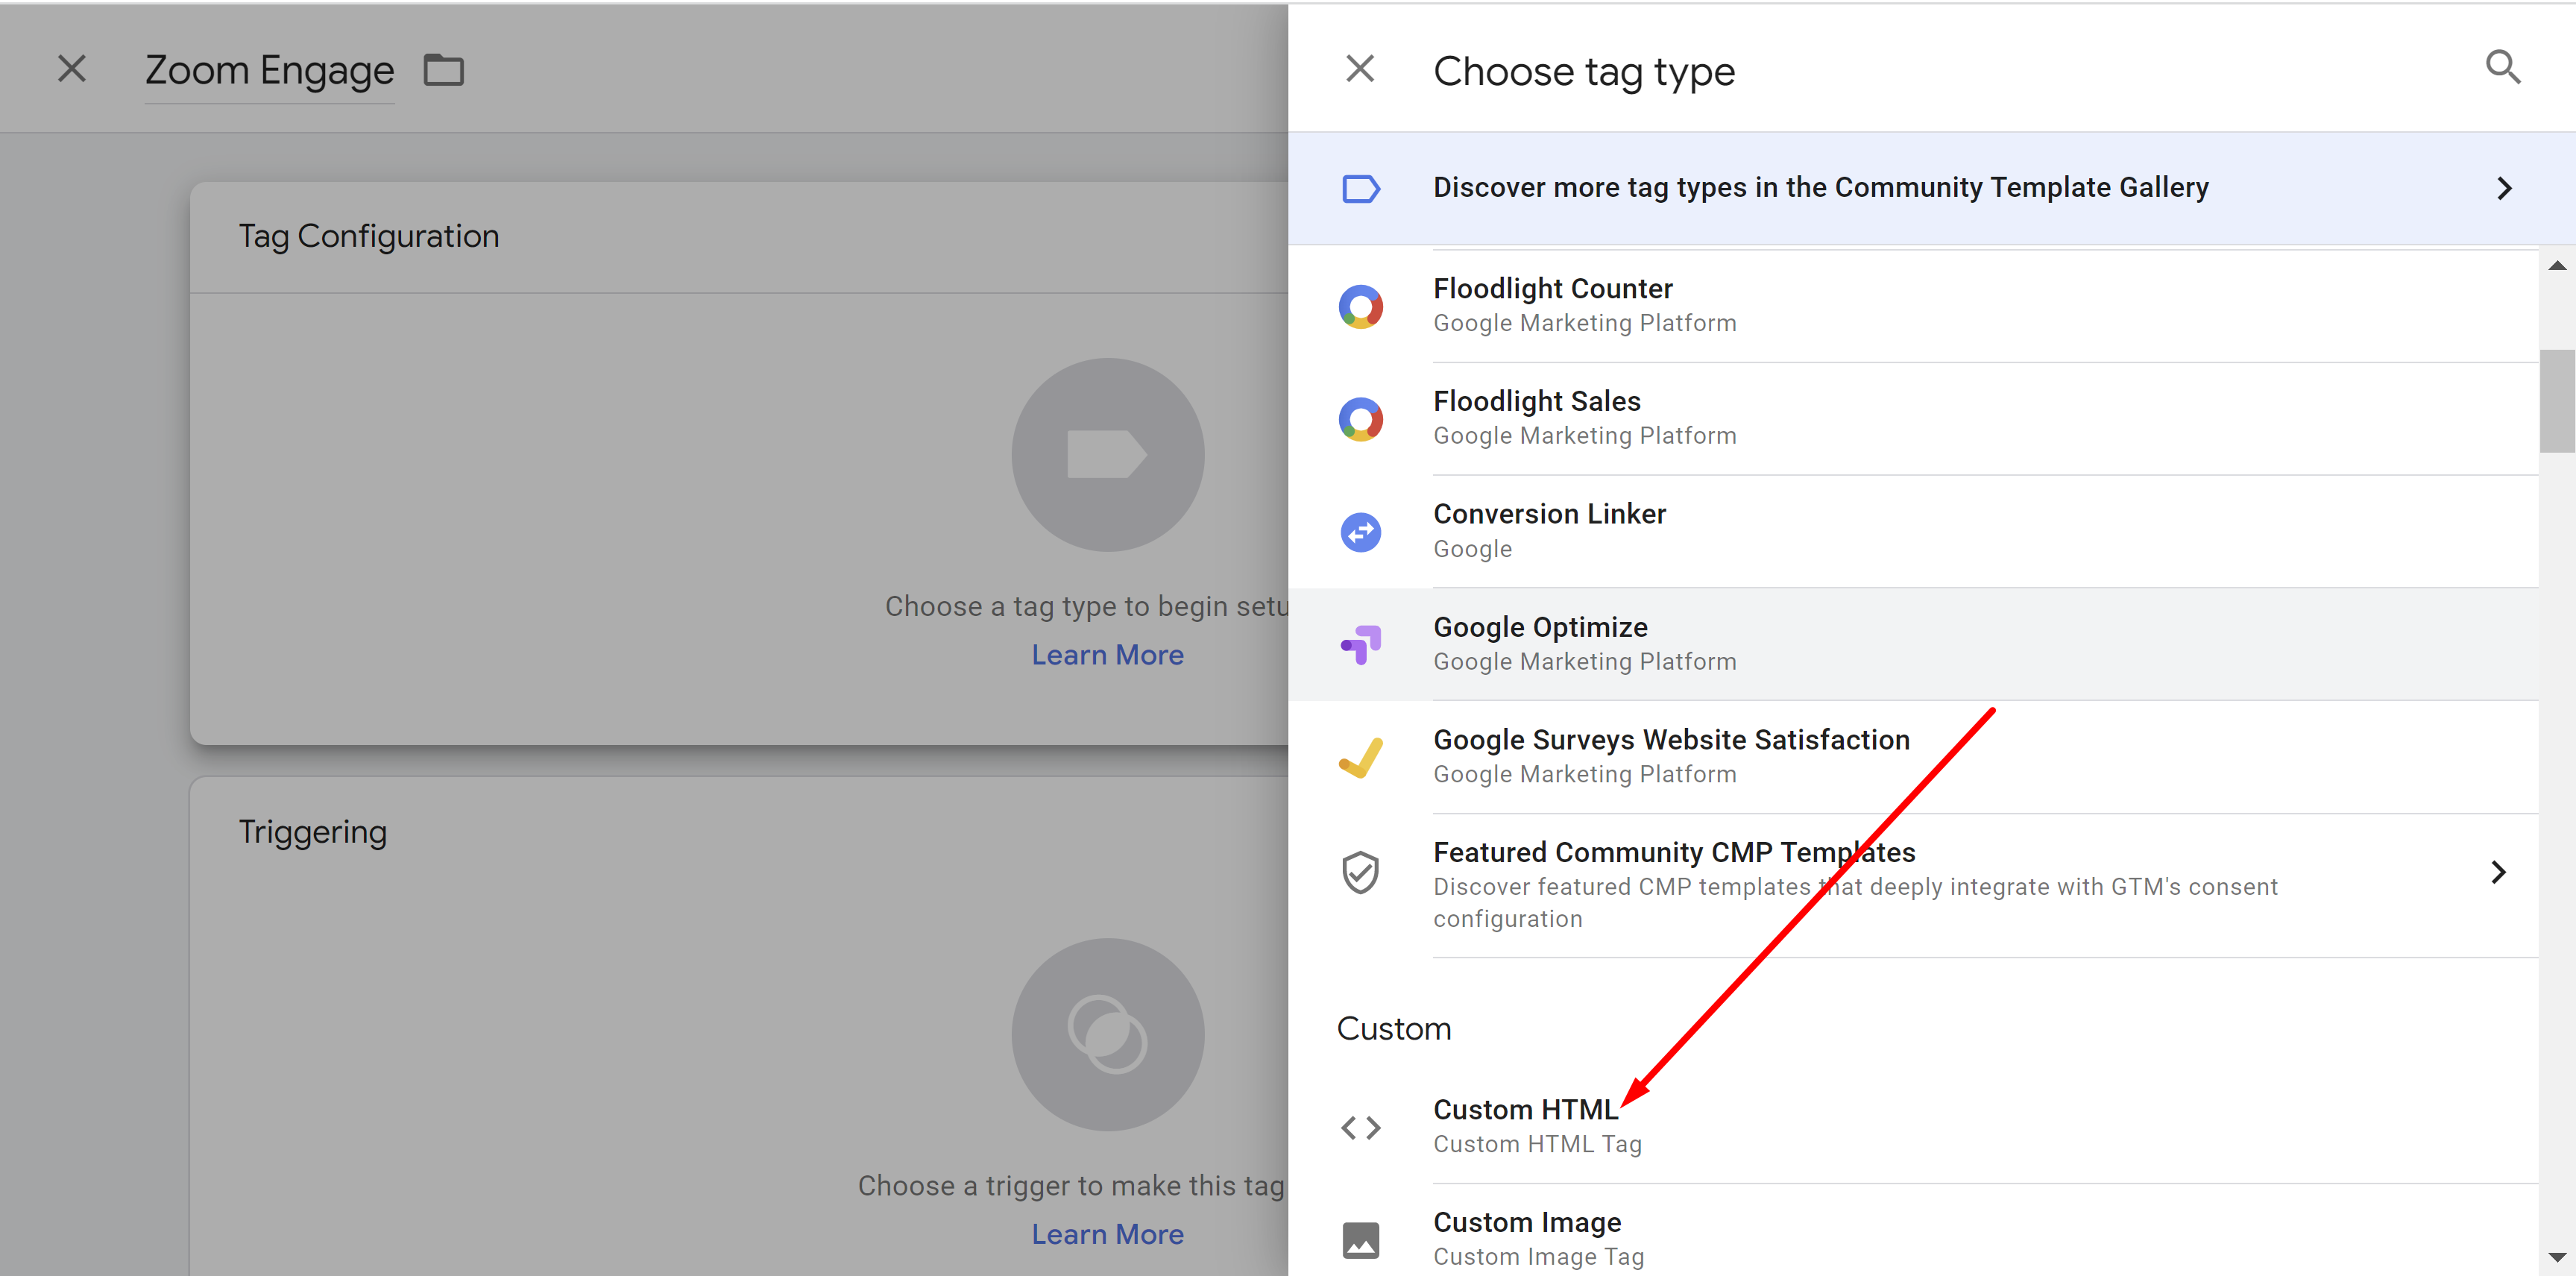
Scroll down in the "Choose tag type" side bar until you get to "Custom HTML" and click on it:
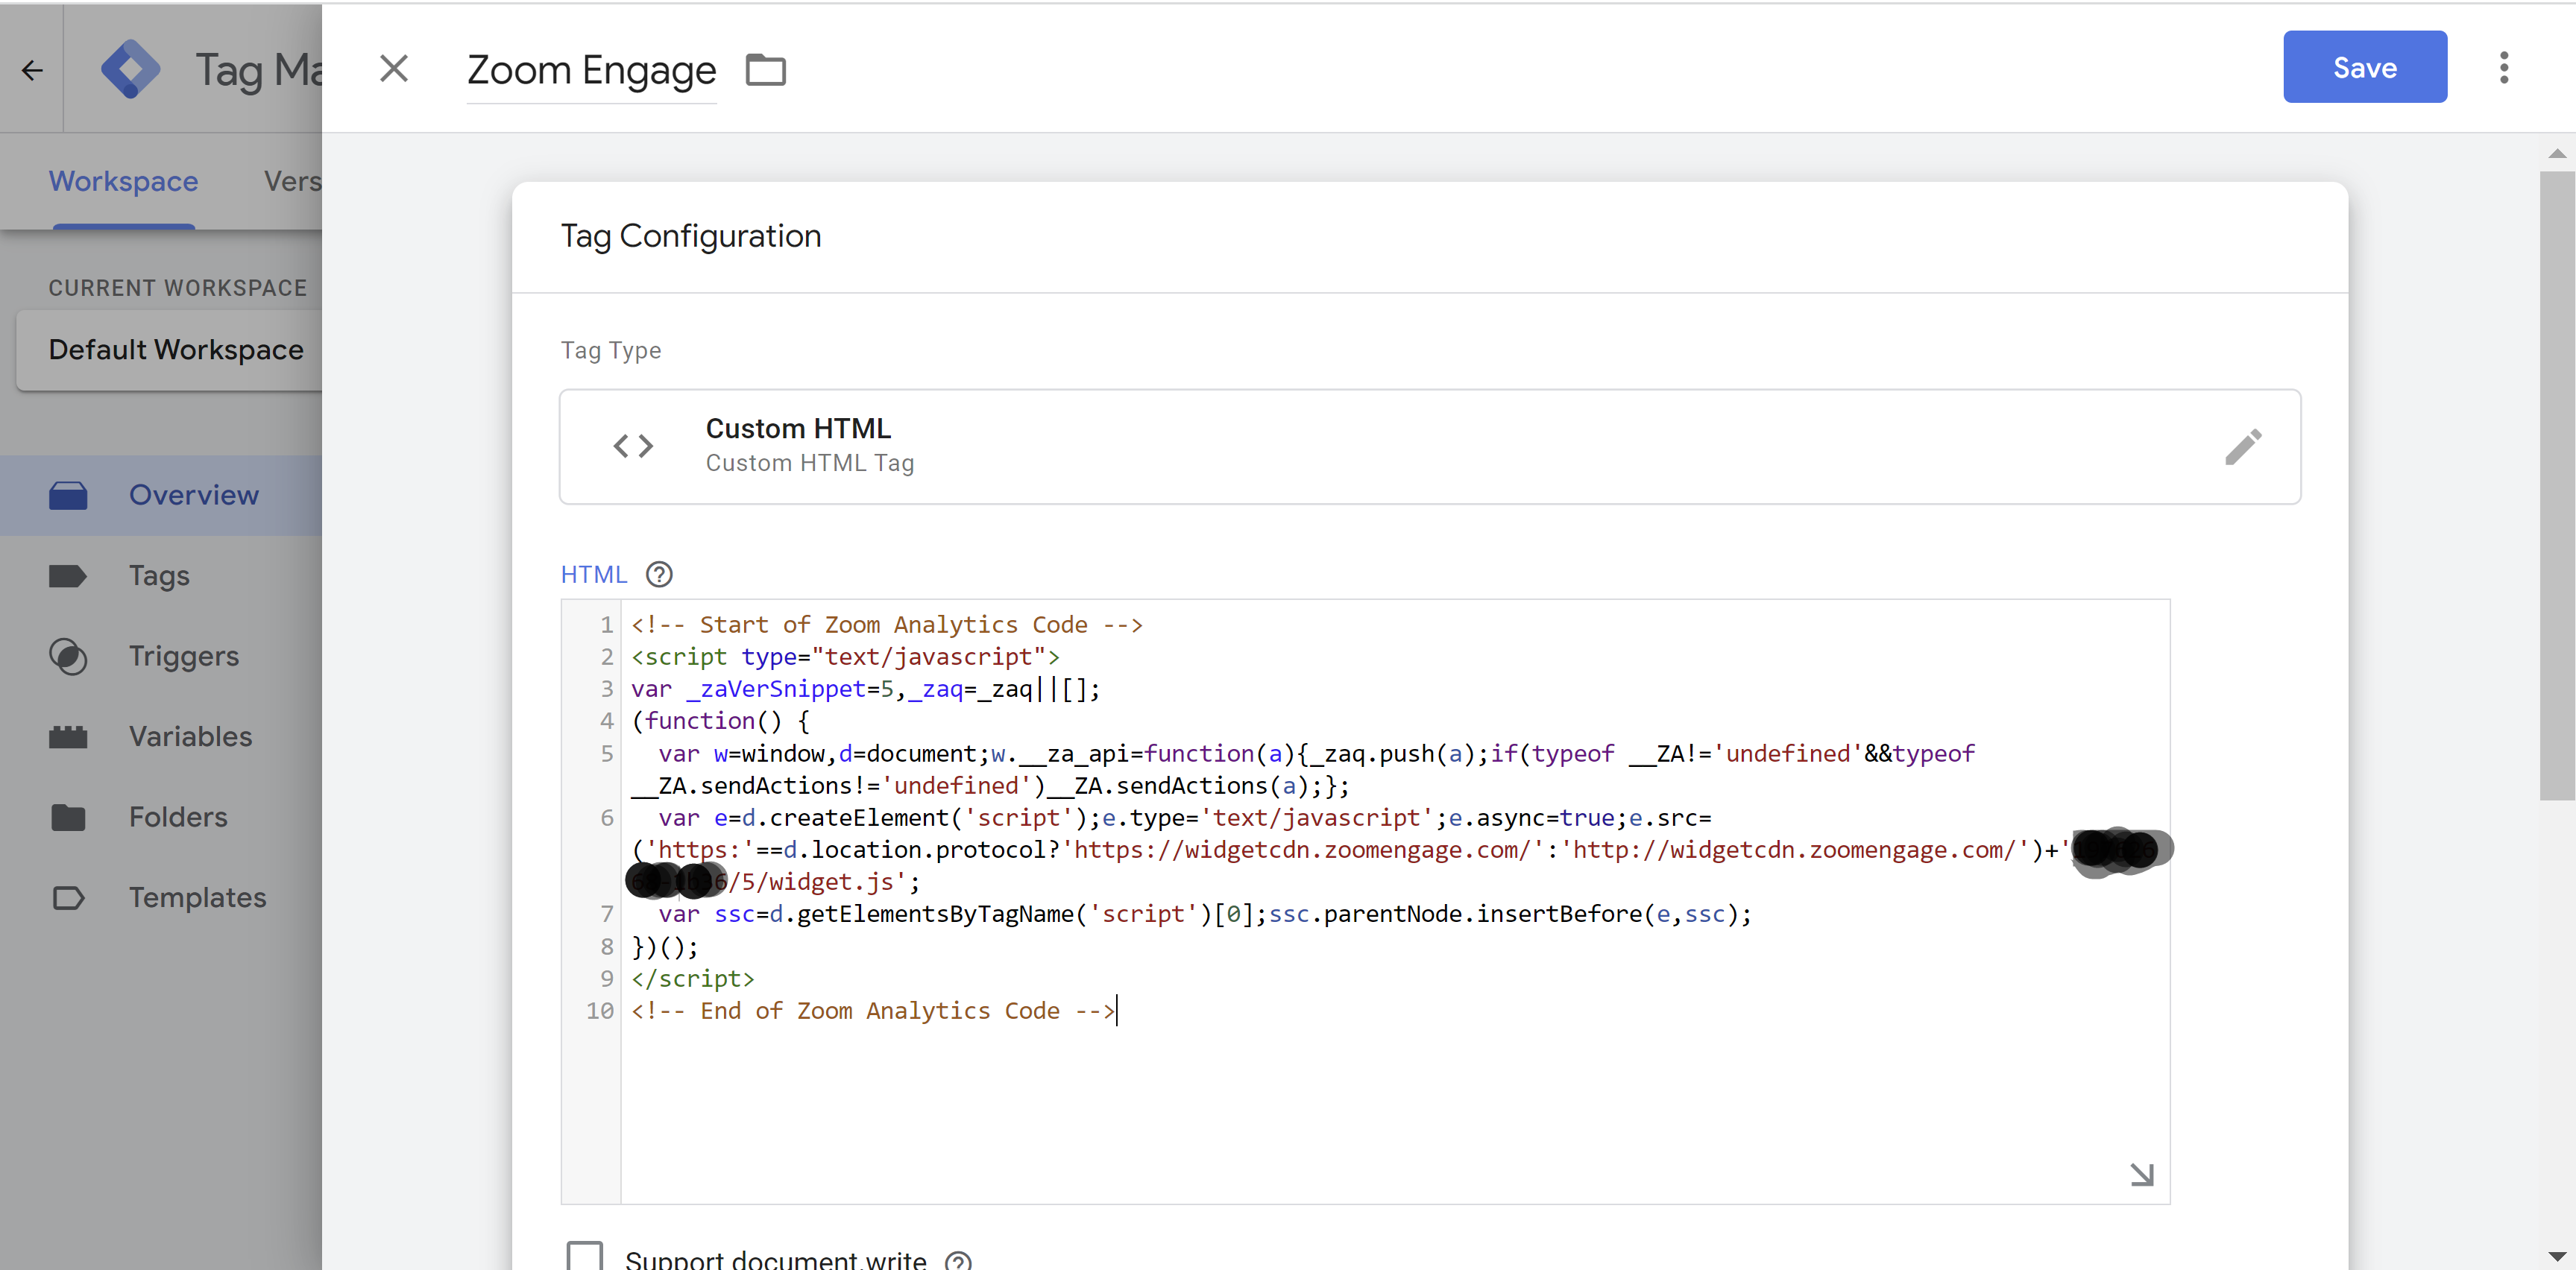
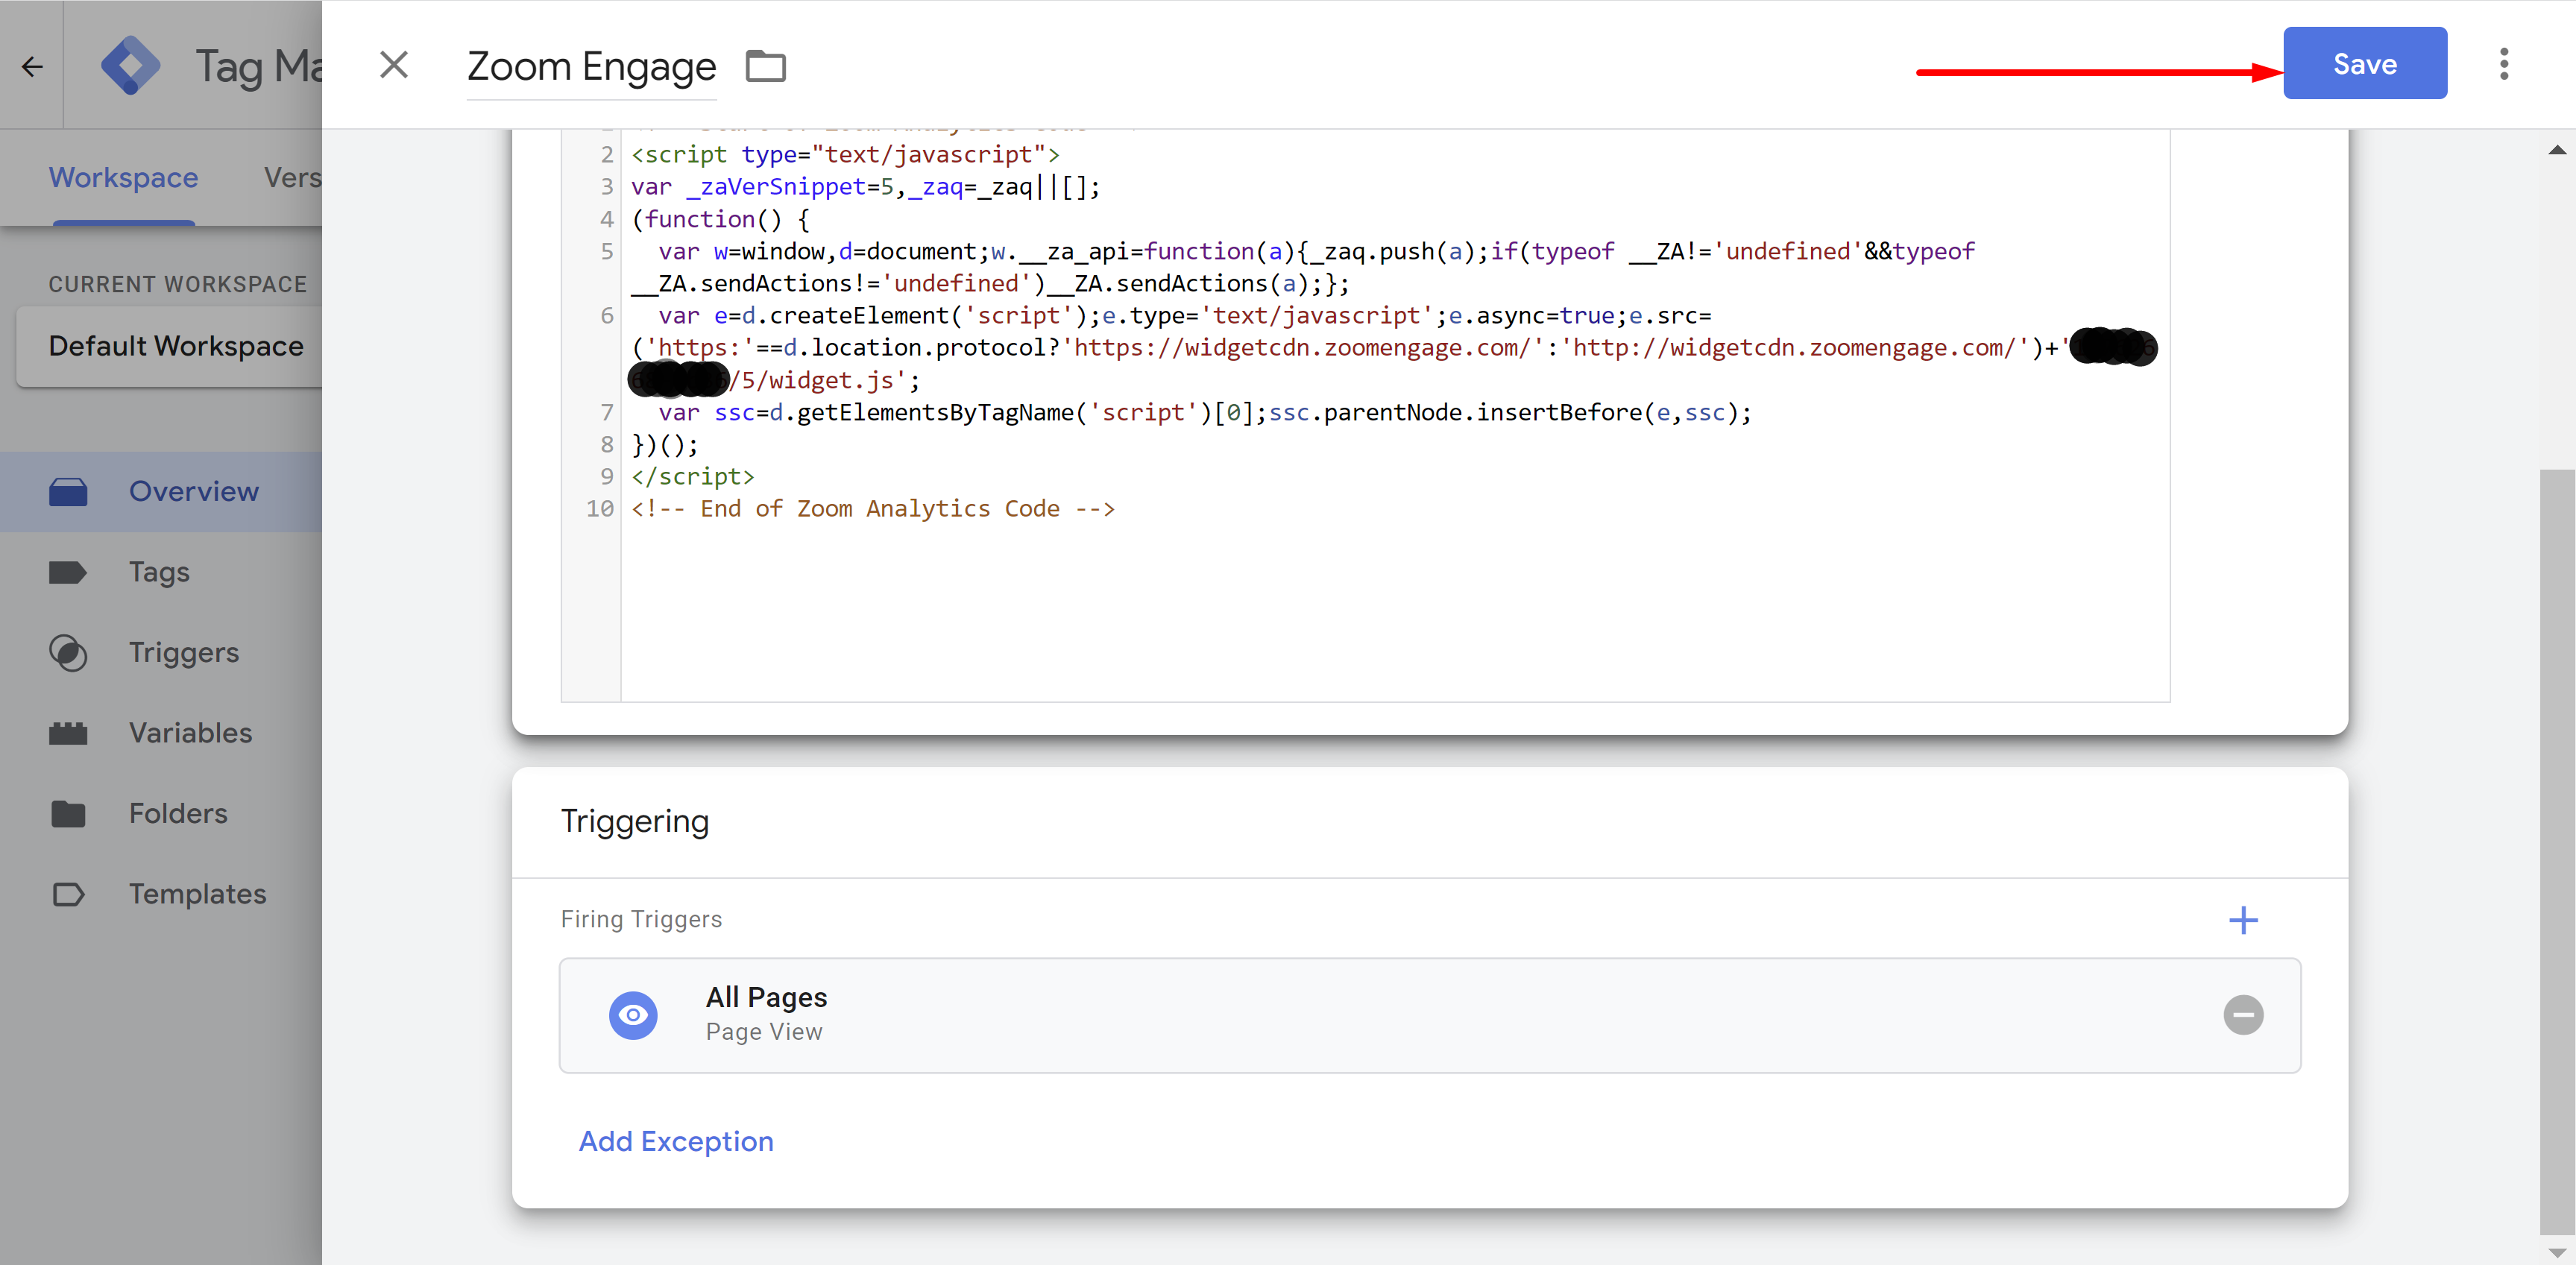
Paste your website-specific Zoom Engage code:
Click on the Pencil icon in the "Triggering" section (you might need to scroll down, depending on your screen size):
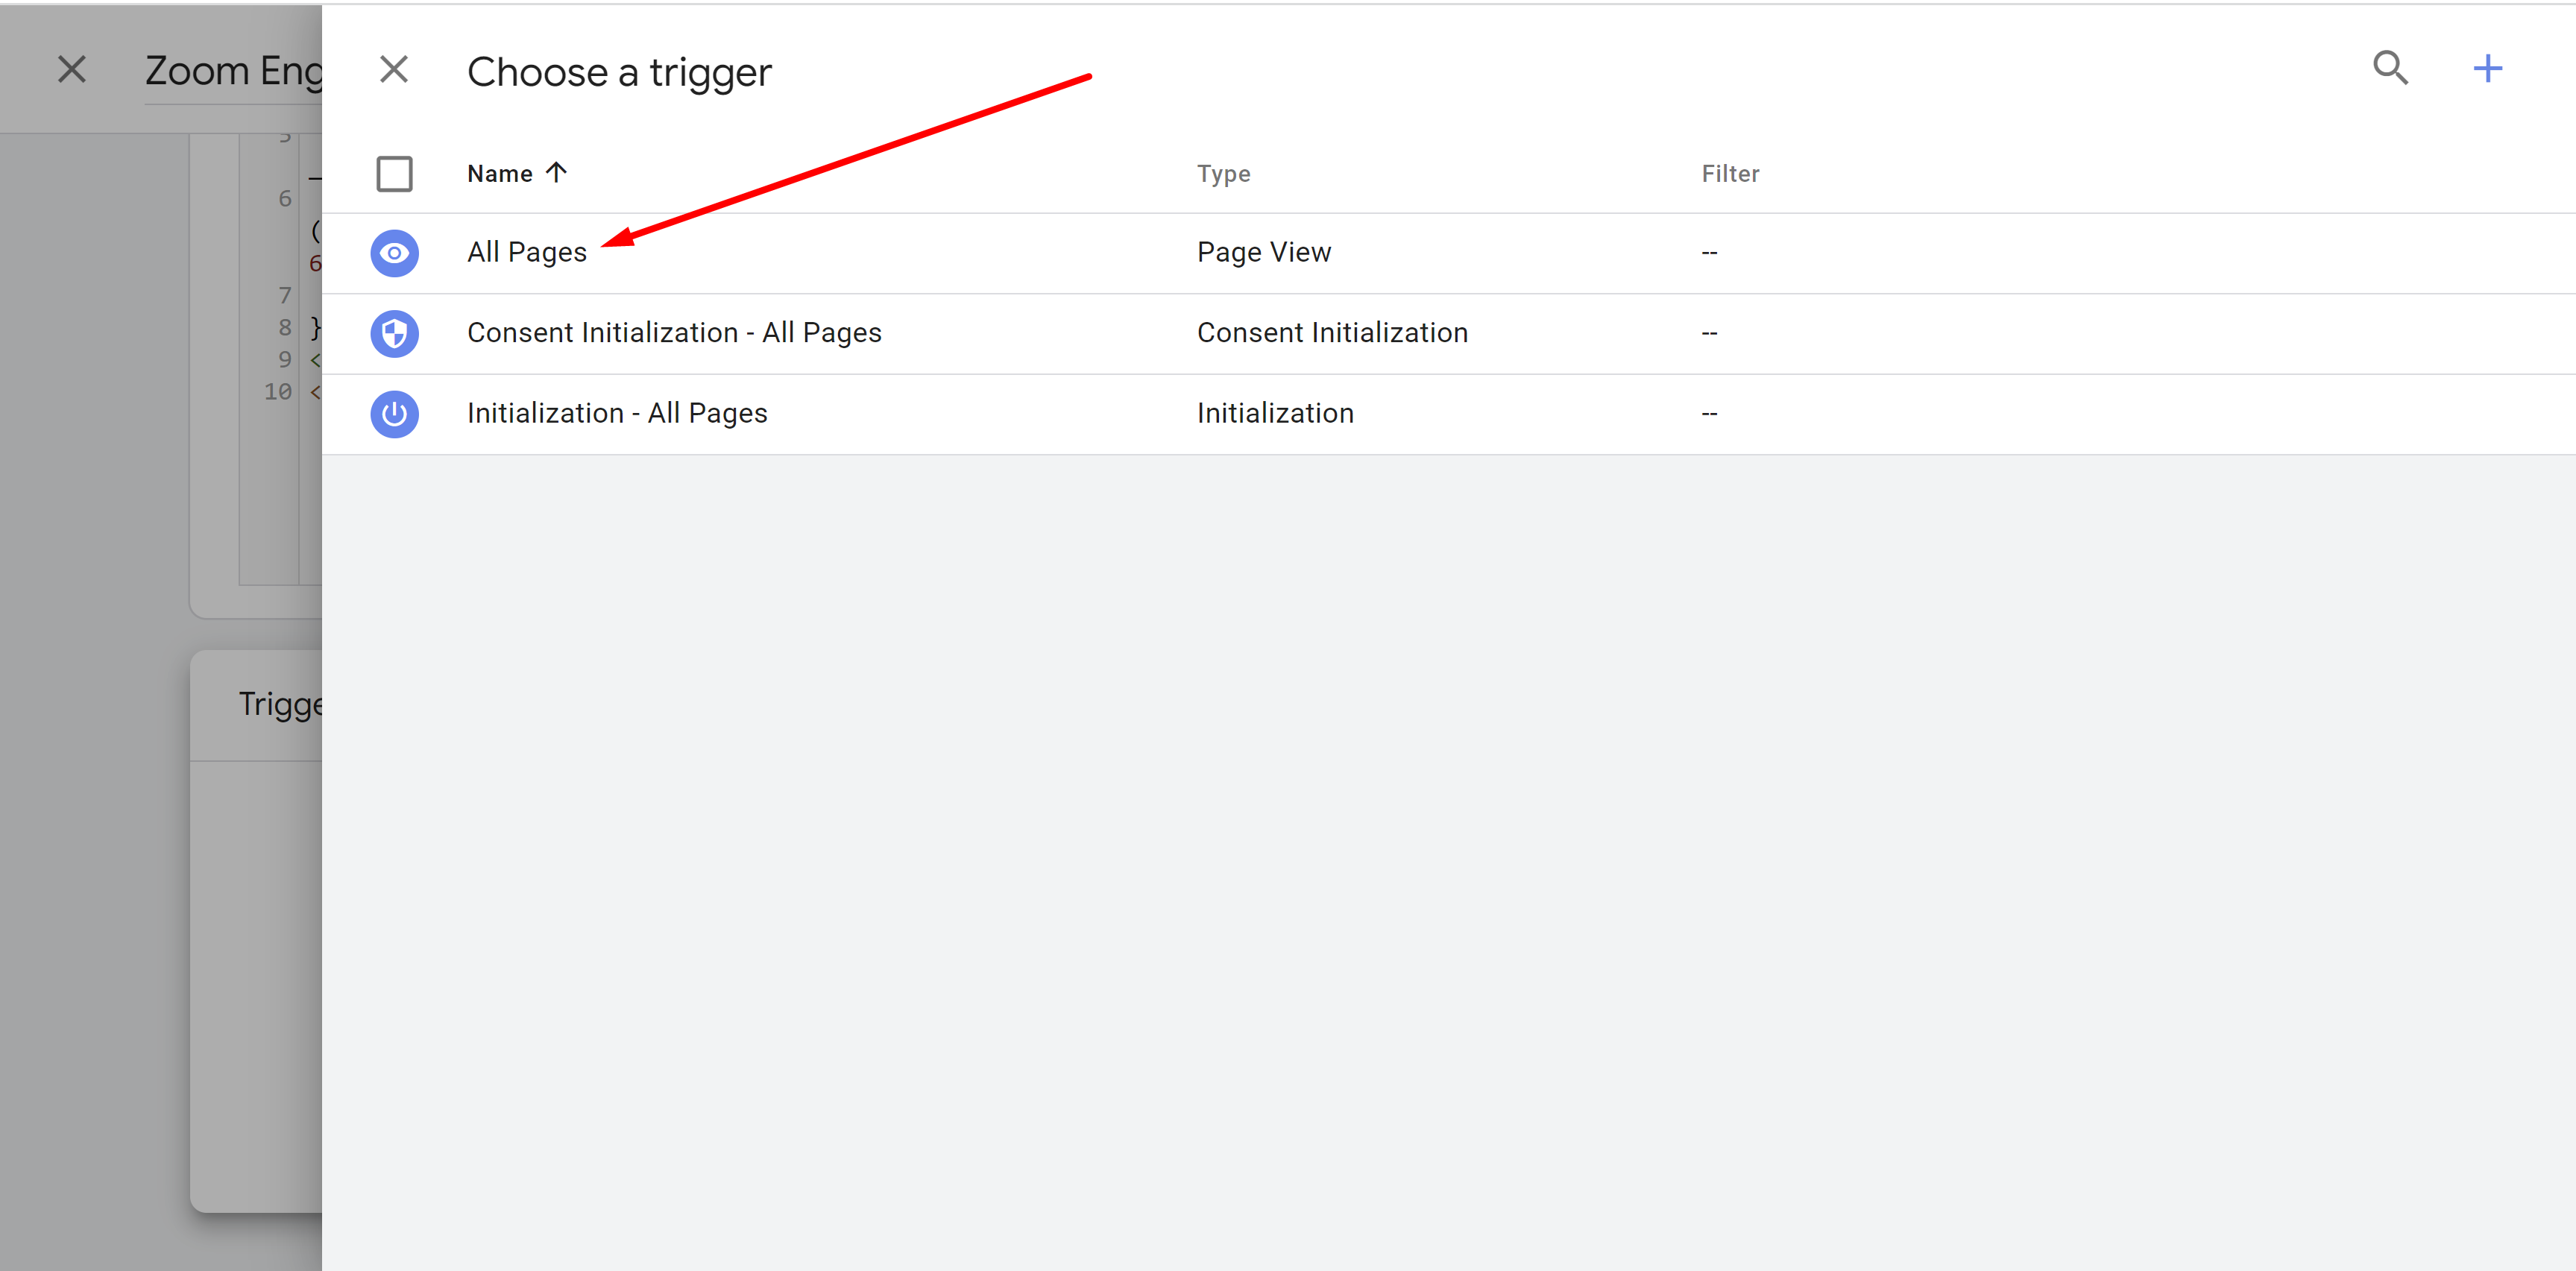
Click on "All Pages":
Click "Save":
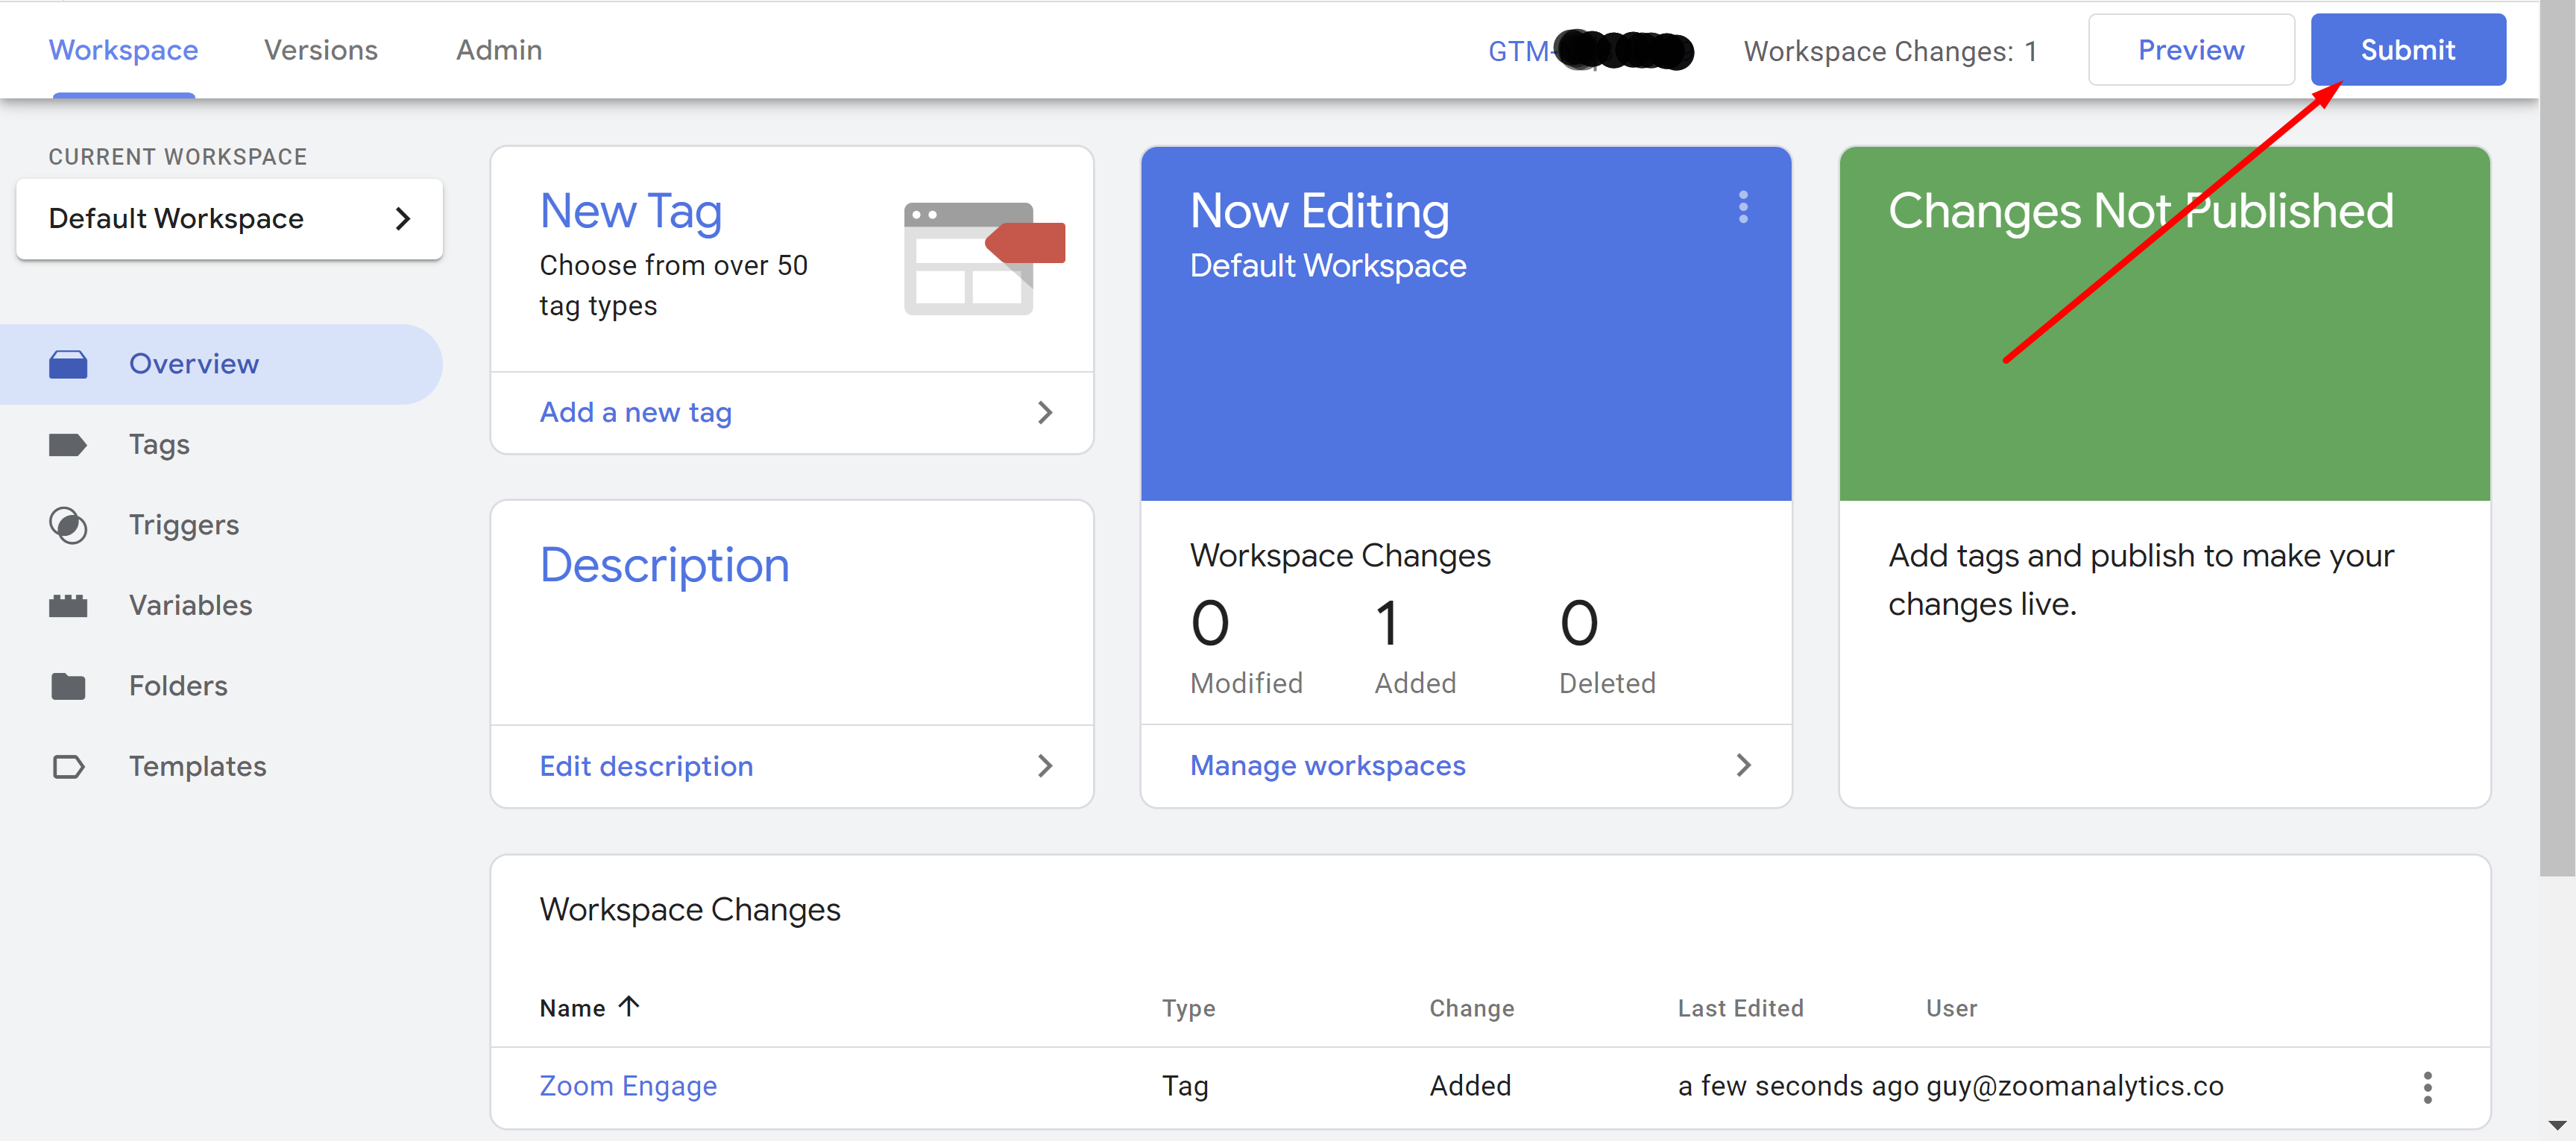
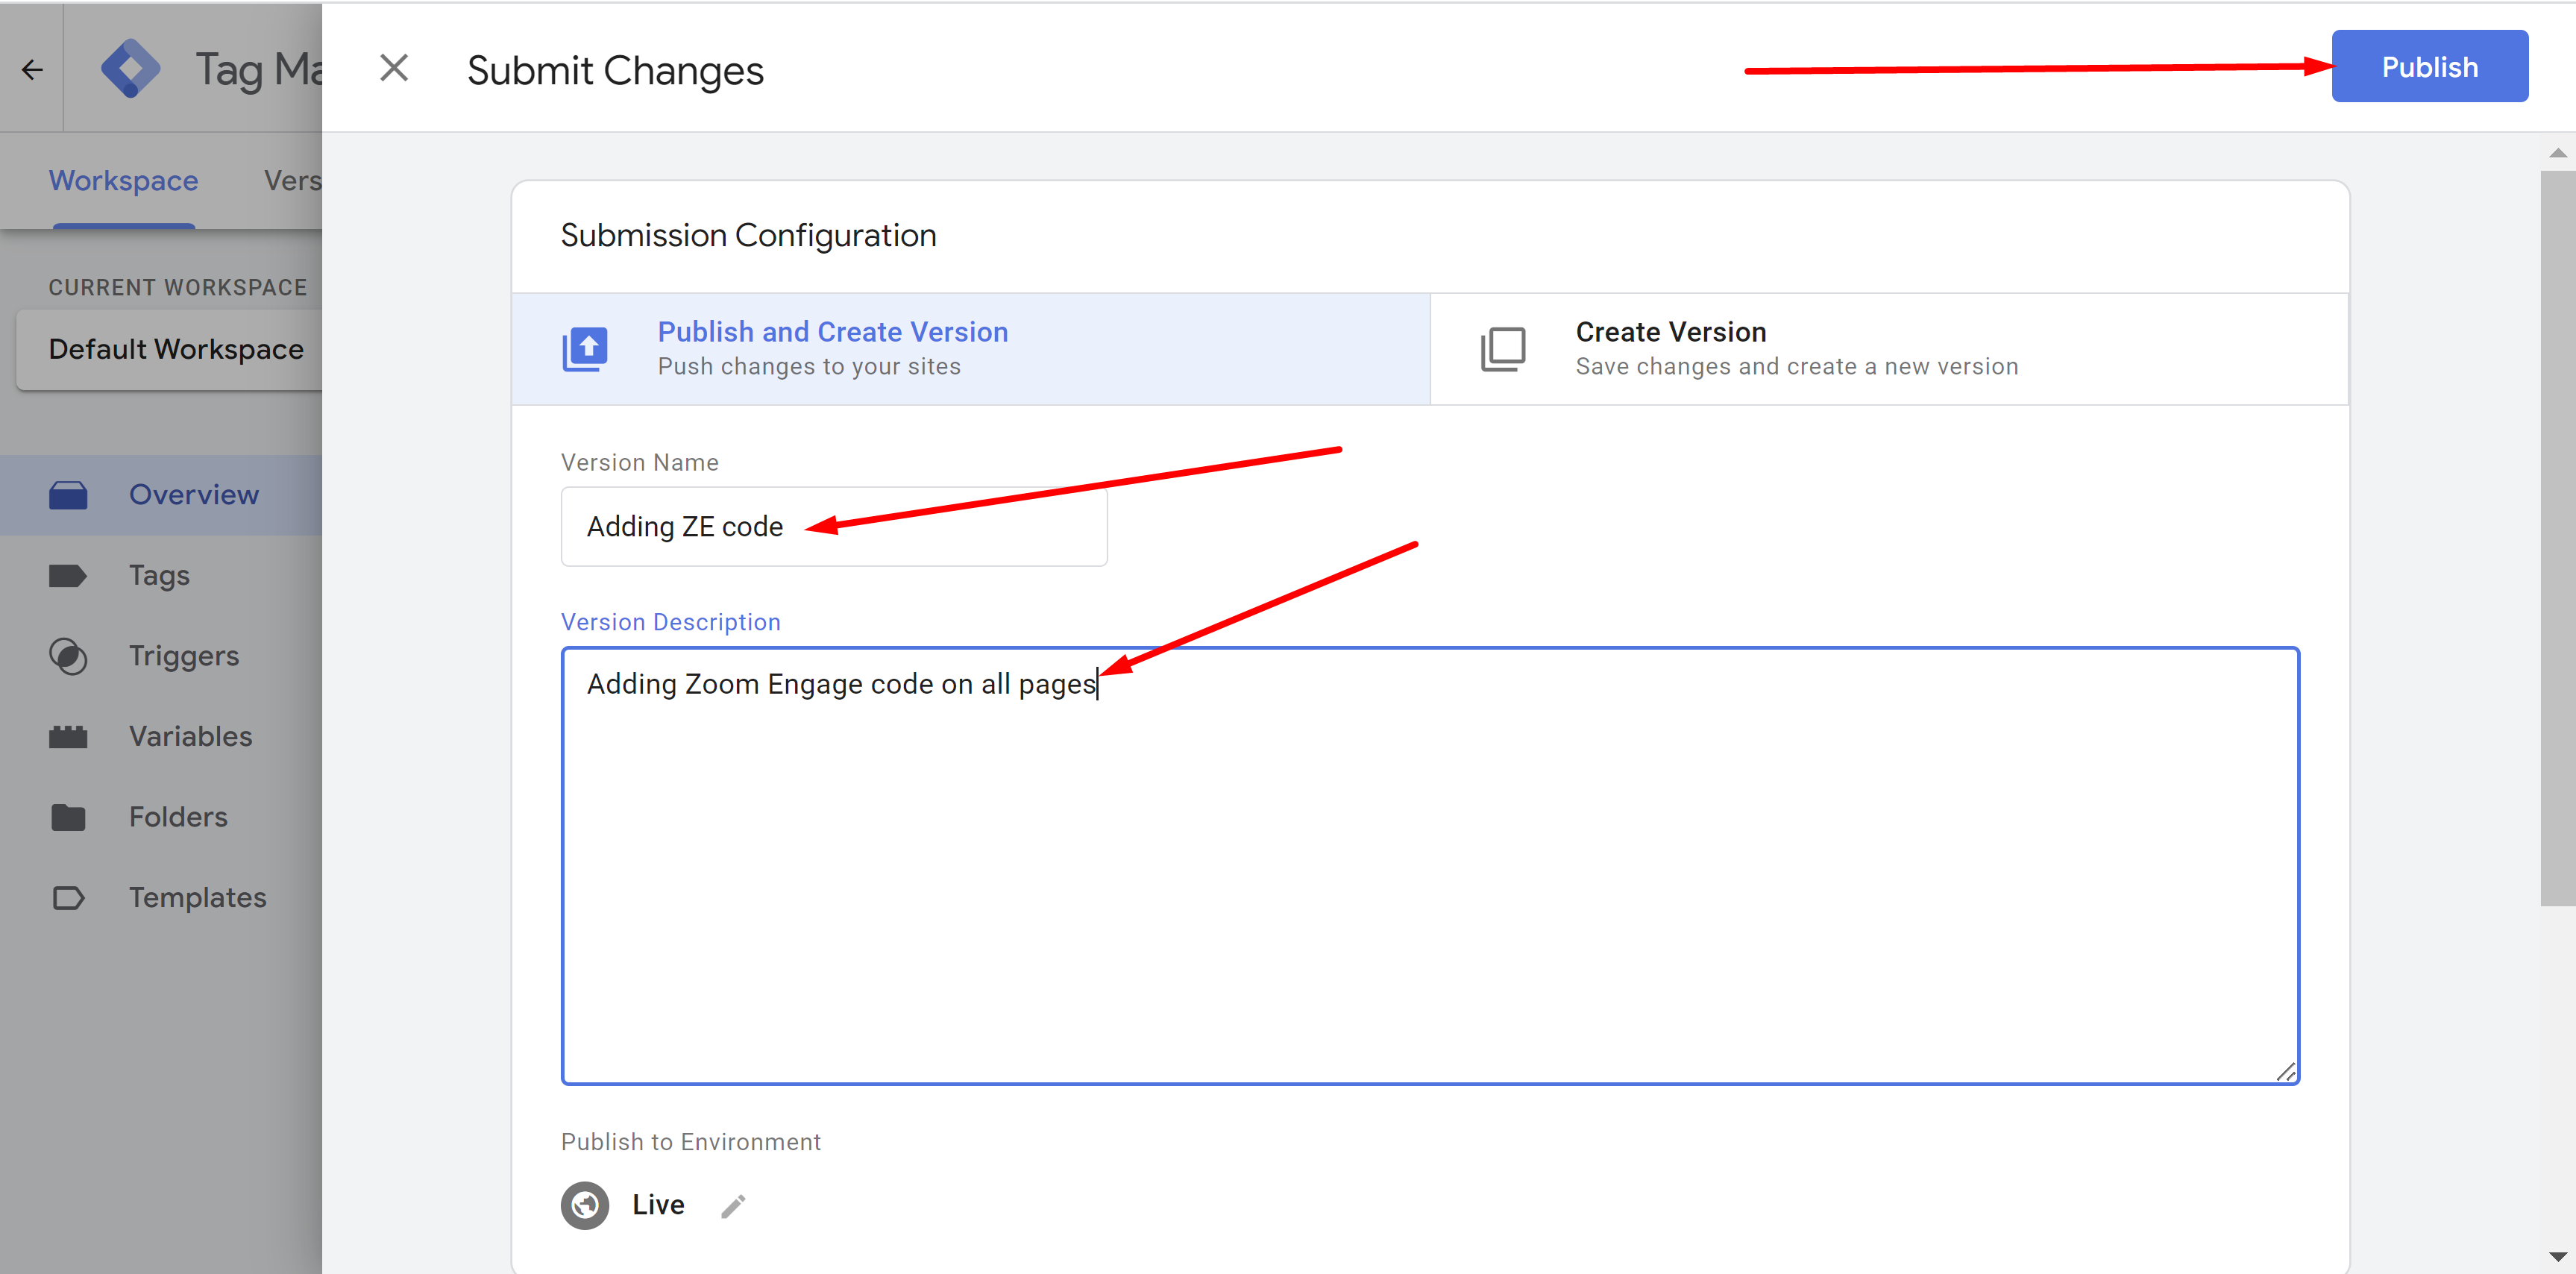
Click "Submit":
Give the version a name (e.g. "Adding ZE code"), optionally add a description (e.g. "Adding Zoom Engage code on all pages") and then Hit "Publish":
That's it - you now added Zoom Engage code to all your website pages using GTM.
If your website is a Single Page Application (SPA) such as React, Angular, Vue, Meteor, Knockout, Sencha, Ember, Svelte or any other SPA, you need to add an additional custom call at each virtual page load. For that you need to also add an additional tag to fire on History Change trigger in GTM.