
Do you want to build an exhilarating website carousel for your users? Provide a smooth UX ride complemented by stunning visuals? Well, you should!
A recent study of over 7.5 million carousel users showed that people decide to use carousels with a swipe rate of a whopping 72%! That is huge.
With the proper guidance, you can reach and even surpass this level of direct interactions between website visitors and your carousel content. Read on, and learn how to make a carousel ad that fulfills the specific needs of your brand, engages users, and helps convert them.
Check out the step-by-step guide below to find out how YOU can build a highly customized carousel without any coding knowledge!
Website Carousel Customization: What It Means
Creating an awesome carousel is all about finding that perfect balance between usability and pazzaz. Making the tool easy on the eyes, while keeping it easy to use! And that's going to take some heavy customization. Because, even though you want your carousel to draw attention, you still don't want it to stand out too much from your brand's visual identity.
Also, don't forget about accessibility. You can make your carousel fit neatly on your website page, but if you do not accommodate people with disabilities, it was all for nothing. Make sure every single video, high-quality image, or gif has a comprehensive alt text, to accommodate people with disabilities. Once more, make sure the pics, as well as the navigation tools, are high-contrast and large. This is also helpful for people with visual impairments.
So, let's move on to the website carousel creation process!
Step 1: Create a Popup
This is the first step to creating your hyper-optimized and hyper-personalized carousel! The one before you design it and add it to your website. The way you're going to do that is by using Zoom Engage (ZE). ZE is basically a popup-building platform, which you can use intuitively and easily, with little to no coding knowledge.
So, this is exactly how your journey starts. By building a popup!
Check out the image below to see the ZE interface.
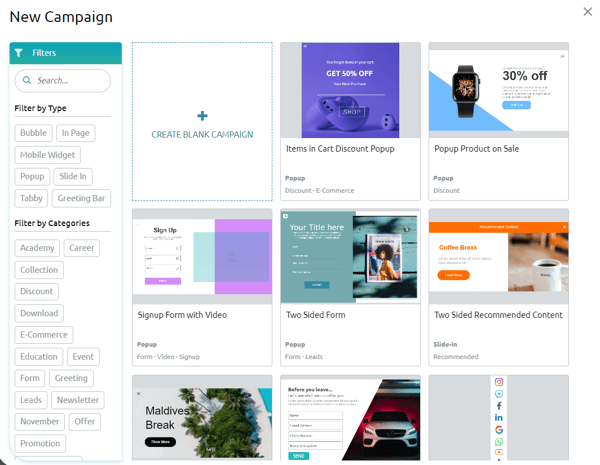 Image 1: Popup, Create a New Campaign
As you can see, you have the choice of picking a pre-created campaign or a blank campaign. Being that we're making a website carousel at the moment, it would be a great idea to go for a blank campaign. This will make the whole process easier to understand.
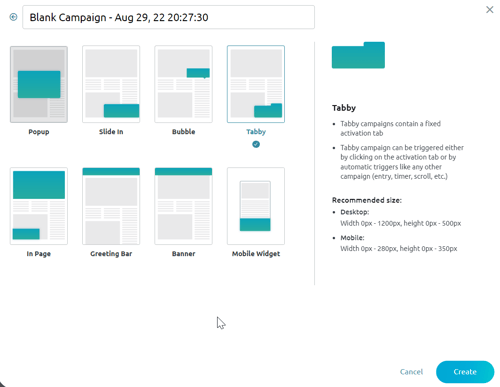 Image 2: Create a New Campaign, Pick a Template
As shown in the image above, there are 8 types of campaigns you can choose from, with recommended specs and a short description. For this exercise, the carousel design website roll will be added to a "tabby."
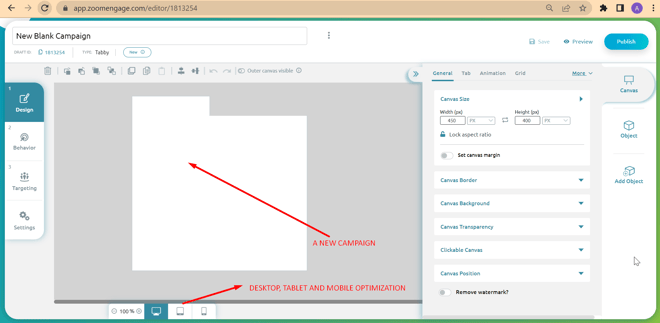 Image 3: New tabby campaign, with many visible features
As you can see in the image above, a “tabby” Popup offers a variety of features for you to consider. This variety of options is exactly what enables high customization of your end product. The options include design choices, responsiveness on various devices, as well as targeting choices that help with audience segmentation.
Let's not get distracted, though! You can discuss all of these options (and more) in depth with a designated ZE customer success manager if you schedule a demo.
Moving on to how we turn this popup into a functional and gorgeous carousel!
Step 2: Add the Carousel, aka How to Make a Slideshow
Notice that we used the word slideshow here because we will be talking about both sliders (displaying one image at a time) and carousels (displaying multiple images at a time). Both will be showcased in the text below.
Let's find out exactly how you can build a user-friendly, highly convertable carousel using Zoom Engage (ZE).
This step involves three small bullets:
- Add Object
- Special
- Drag and drop
Do this, and you'll have a customizable carousel ready for further inspection!
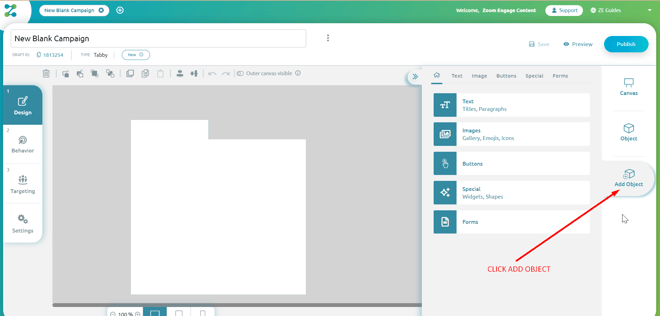 Image 4: Add Object
First, you need to click the Add Object icon. This will reveal a menu including options such as Text, Image, Buttons, Special, and Forms.
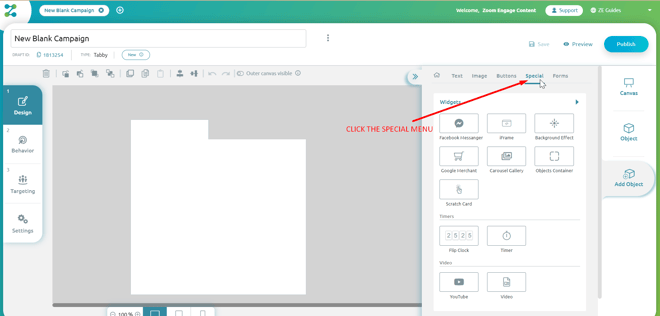 Image 5: Special
To access the Carousel, you'll want to click the Special icon. Notice that your popup offers a variety of other options, including a Scratch Card, a Facebook integration, as well as background effects! So many fun features at your fingertips.
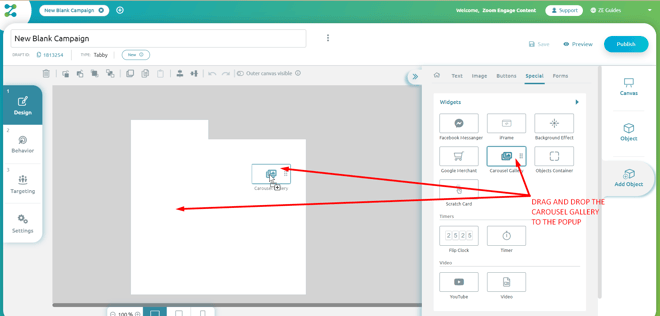 Image 6: Drag and drop the Carusel
Ignore the tempting, shiny trinkets for now! This Guide is about Carousels, after all. To add a Carousel feature, just drag and drop the Carousel Gallery icon to your popup. Once you do this, you'll be able to make changes to the carousel itself!
Step 3: Customize the Carousel
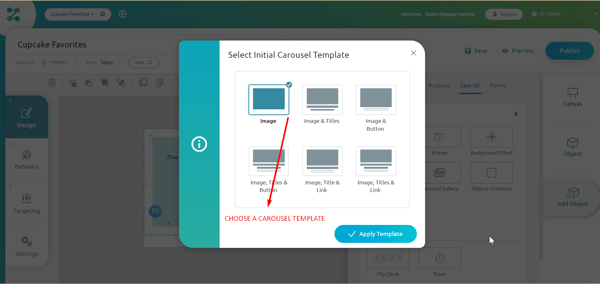 Image 7: Choose a Carousel template
As you can see, you can choose to create a carousel with or without a button, text, title, or link. If you click the first option, which only displays the image, you can still add all of the abovementioned elements manually. Choosing a specific template is only there to make the process easier.
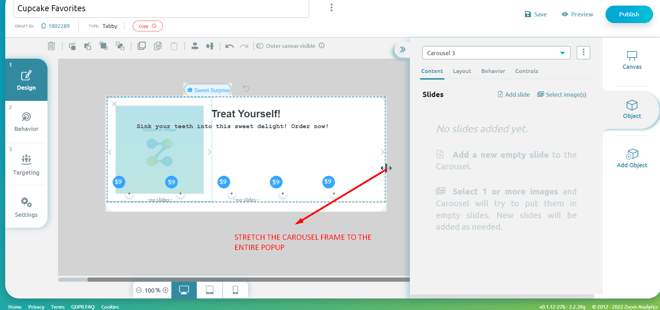 Image 8: Adjust the Carousel frame size
Another aspect of customization, adjusting the carousel frame size allows you to play around with the design.
You can make the background play a bigger or a smaller part. It's up to you. Additionally, the dimmed text to the right of the popup gives you some ideas about the next steps. You can add a slide or select images! Speaking of adding slides...
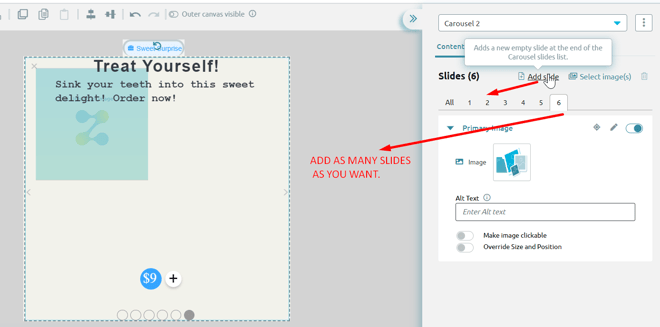 Image 9: Click the "Add Slide" button to add slides
As you can see, you can choose to add as many slides as you want to your carousel. You can also make as many slides as you want visible at first glance.
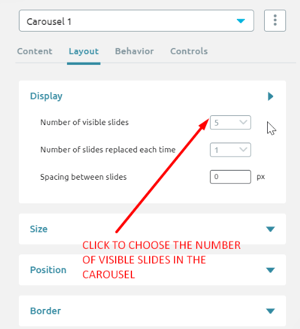 Image 9.1: Choose the number of visible slides
The whole point of a carousel is displaying content while saving room on your website page. Still, it's up to you how much space you want your carousel to take up. The visible slides option is available under the Layout menu.
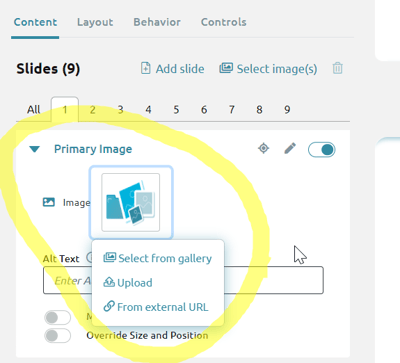 Image 10: Upload images to your Carousel
This part is always the most fun. Adding images to your carousel makes the whole thing come to life with flying colors.
As you can see, the ZE platform allows you to upload your own pics, select some from ZE's gallery, or add some from an external URL.
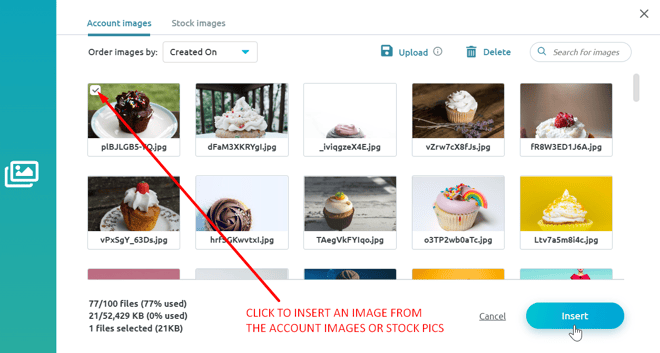 Image 11: Add Images from the image gallery
The exact dimensions of the pics are recommended in the menu itself, and of course, the success of your carousel website design depends largely on image and text quality. So make sure this image quality is one of your top priorities.
 Image 12: Layout: Choose the number of visible slides
The number of visible slides makes all the difference between a carousel and a slider. As mentioned before, a slider is a slideshow with only one visible image or piece of content, at a time. A carousel, on the other hand, has two or more visible slides. You will get a chance to see a video example of both in the text below!
Best Carousel Ads: Carousels or Sliders?
Choosing between using a slideshow with one or multiple visible images is no easy task. You are going to have to make this choice based on the way it fits together with the rest of your website.
A carousel slider takes up less room on your website and draws the audience's attention to one image at a time. Additionally, it would be a good idea to make your navigation tool below the image a thumbnail. That way, users will be able to assume what awaits them on the following slides. Check out the example below, built on the ZE platform:
The Final result 1: Website Slider Example
Now, what you need to pay special attention to is usability. Regardless of how stunning your carousel looks, you HAVE TO stay away from bad UI design. So, how do you do that?
- Never use those elusive and semi-transparent navigation features such as tiny arrows and bullets.
- Use bigger elements with high contrast compared to the carousel background.
- Visual slider indicators such as bullets, thumbnail navigation, numbering, etc. need to be eye-catching, clear, and easily noticeable at first glance.
This is how you can keep your users in control of their carousel interactions.
The Final Result 2: Website Carousel Example
In the example above, you can see a standard example of quality Carousel UX design. The cupcakes are centered, and the color of the background matches the blog post background, as well as the overall feel of the website. The arrows to the left and right of the carousel are easily noticeable. Additionally, the bullets beneath help you tell exactly where you are along the carousel design pattern.
Final Words
To build a highly customized and highly convertible carousel design, you'll need a user-friendly, diverse platform such as Zoom Engage (ZE). And little to know coding knowledge! On ZE, you'll be able to drag and drop a carousel or a slider anywhere on your website and make it look like a natural part of your website fabric.
We hope that the two website carousel examples above will entice you to try your hand at building some amazing slideshows on your own website.