
Pretty much every website has a contact form. Therefore, creating one yourself is not a matter of if, but rather of how. What’s the simplest, yet the most effective way to build a fancy-looking contact form for your website?
You can build one yourself! With the use of Zoom Engage’s multifaceted online platform, you can create this pathway for consumer connection in a jiffy. In the text below, we’ll go through the reasons why contact forms matter (and trust us, some of these might surprise you). And we’ll show you how to build one, DIY style. All you need to do is use clicks and drag-and-drop motions.
Even if it’s just to satisfy that insatiable curiosity, check out how you can build a website contact form with minimum effort and maximum impact.
Contact Forms vs. Social Media Posts
On your way to building this relationship with clients, your contact forms will be the most “official” communication channel out there. This is sadly why many people hesitate to use them. In our fast-moving mobile-first and social media-first landscape, phone calls and email conversations are getting increasingly uncomfortable for the average person.
People need to voice their concerns, offer praise and opportunities, or ask for collabs and interviews. And being that people are creatures of habit, your primary communication channels would likely be social media such as Instagram, Linkedin, or Twitter.
Properly designed contact forms help substantially with clients’ questions. Contact us forms guarantee to acknowledge, examine, and address consumer issues. Issues they had to put more thought and time into than your regular Facebook comment.
Why Are Contact Forms, or Nothing Suits You Like a Suit
You build contact forms to allow customers, prospects, potential employees, magazines, and other media to get in touch. You can make this window into a person-to-person phone conversation or email interaction easy, fun, and inviting.
You want to know how?
So, let's start by going through the motions of how to create a contact form. Regardless of the hardware or software, you’re probably working with the following steps ought to be a breeze. Check this out.
Step 1: THE BLANKISH SLATE
This is mostly what your screen would look like before you start creating the form. This could be a popup, a slide-in campaign, or just an immobile in-site campaign, an example of native marketing. Indistinguishable from the rest of your website. We took the liberty of adding a picture of a model in a cerulean suit. We are creating a contact form for a hypothetical store, selling luxury apparel for men.
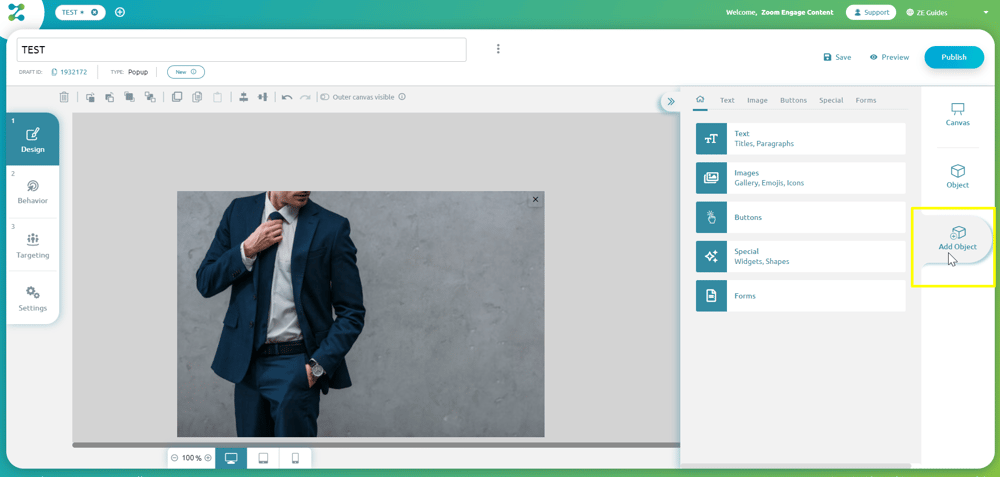
Image 1: Man in a Suit and a Blankish Canvas
Step 2: CLEVER, INVITING COPY
We added the cover photo, and now we need some copy. This step allows you to really get creative, and show your website visitors what your brand is all about. Over the male model, we added an all-caps title, LET'S TALK. Simple, concrete, direct, and conversational. The "Share your passion for smart, luxury apparel with us" bit is a bit more descriptive of what this campaign's intention really is. We will not be going too deep into how you can create text via ZE. If you are excited about this, feel free to check out our other article for more details.
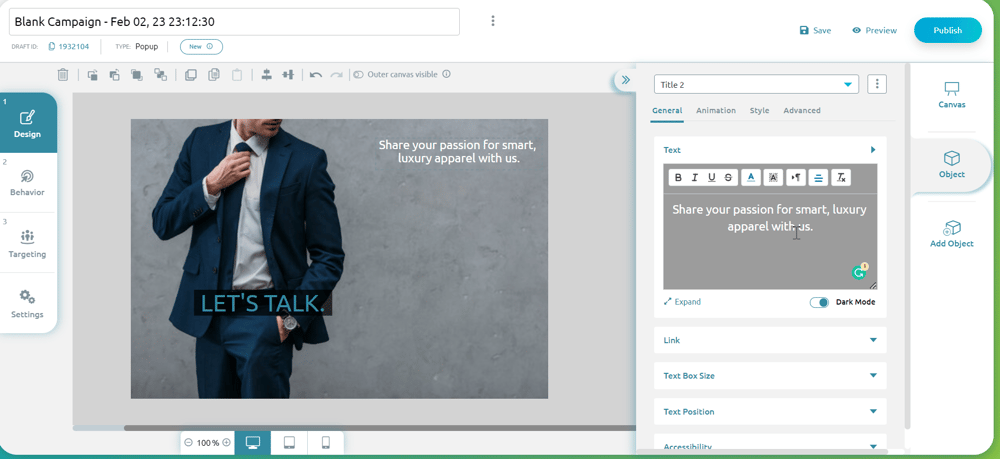
Image 2: The Copy
Step 3: ADD OBJECT, FORM
To the right of the canvas, you can see the ADD OBJECT and FORM commands. Simply drag and drop the form to wherever you want it to be on the screen. You can see many other options here, such as Text, Images, Buttons, etc. These, however, are not yet relevant.
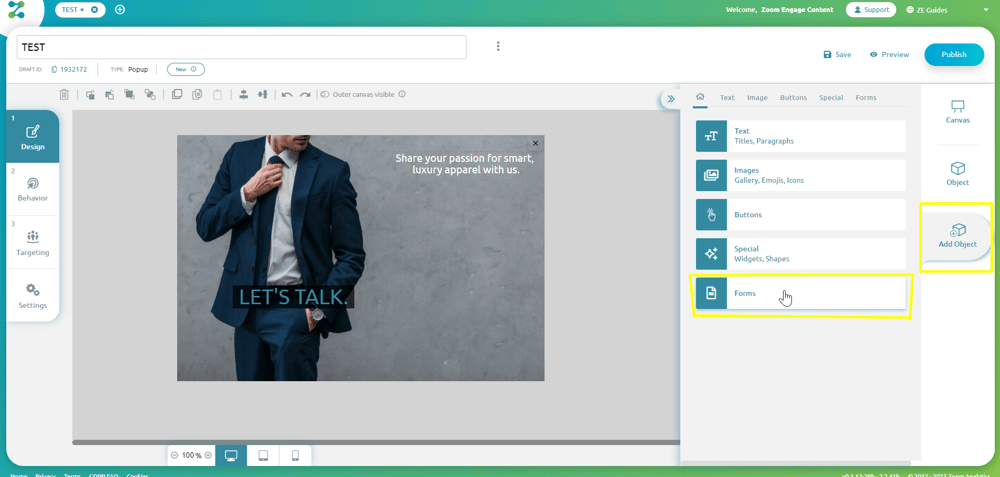 Image 3: Add Object, Form
Step 4: CHOOSE FORM TYPE
There are three types of forms you can choose from: the Newsletter, Basic, and Leads. For a Contact form, you'll probably want to go with leads.
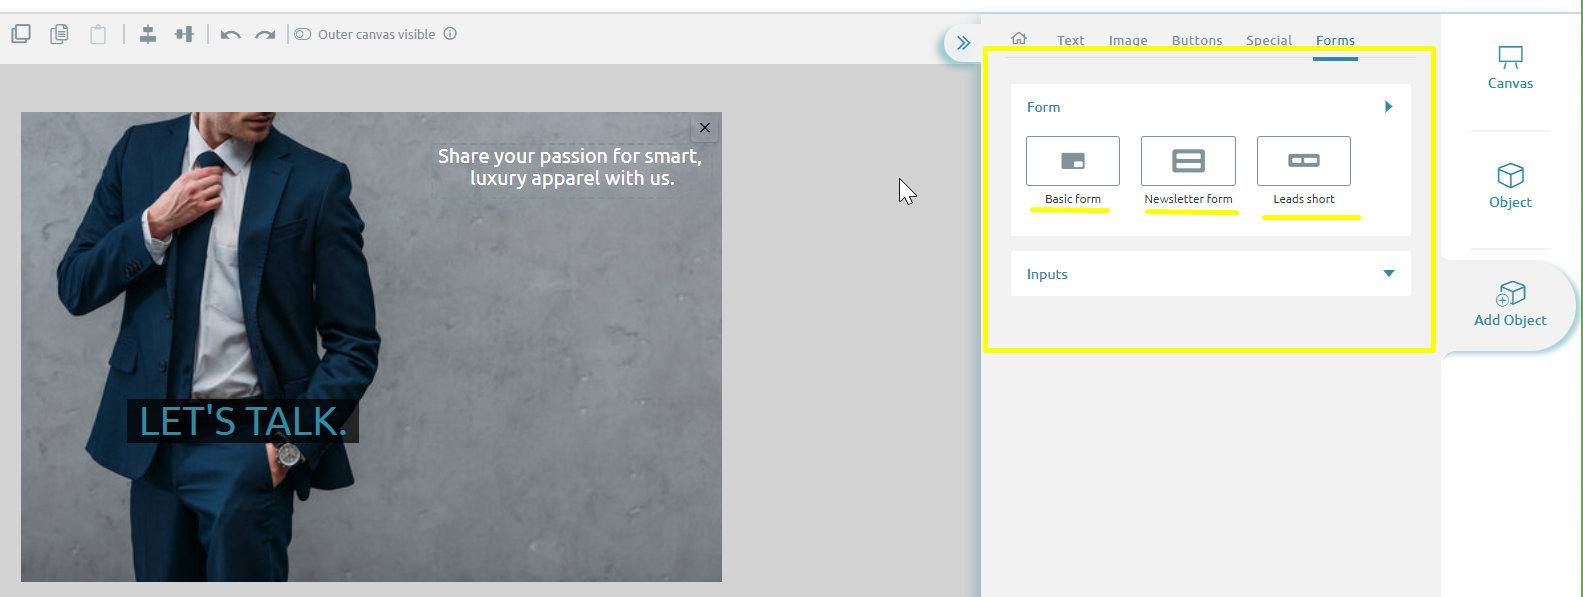
Image 4: Choose Form Type, Leads
Step 5: DRAG AND DROP THE LEADS FORM
All you need to do in this step is drag and drop the LEADS form to your canvas. This is because, other than name and email inputs, this form also offers a message field. 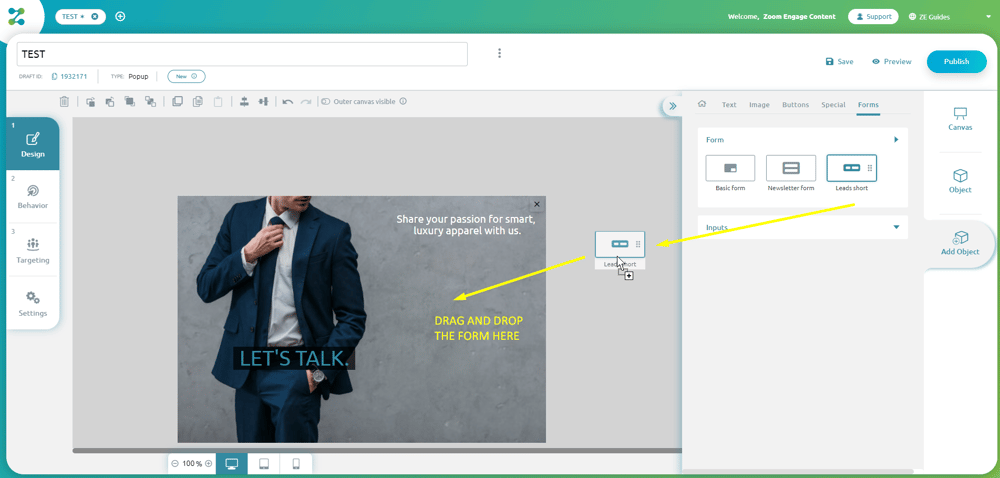
Image 5: Drag and Drop the Leads Form
Step 6: MOVE THE FORM TO WHERE YOU WANT IT TO BE
Feel free to botch this one, as you are the only one who truly decides where to put the form. Stick to the rule of thirds, make sure the form is as visible as possible, and you should be fine. Once you have made up your mind, you can brush up on your choice via the ZE interface. We made sure that the form is "positioned" so as to match the copy above.
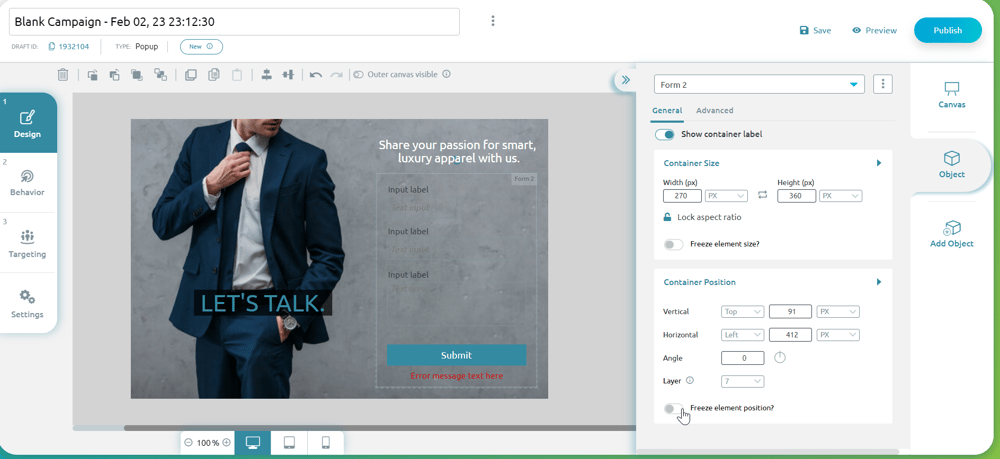
Image 6: Container Position
Step 7: FORM DESIGN, COLOUR, AND INPUT TITLES
Being that our copy was white, we decided to make the containers, as well as container names white as well, to really make them pop, while staying easy on the eyes. As you can see, you can manipulate the precise colour value you desire. This is how we got the "Submit" button to match the colour of the "Let's Talk" copy! You can probably see why this is so important for making sure your campaign is native to your website.
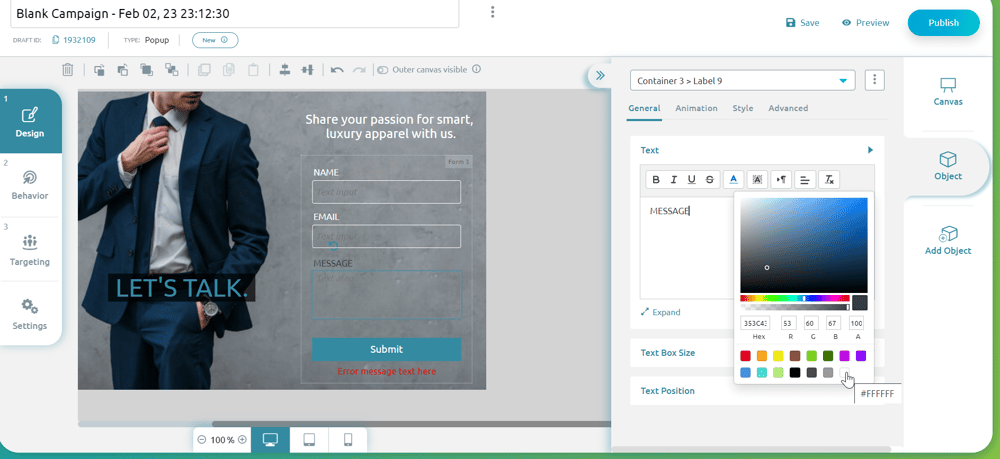
Image 7: Form Design, Colour, and Input Titles
Step 7.1: DETERMINE INPUT TYPE FOR EACH CONTAINER
Make sure that the "NAME" input allows text, that the "EMAIL" input allows email, etc. If you have "TEL" inputs, you can add a phone number. The same goes for passwords. The whole point of this section is to ensure that the user does not make a mistake. If, for example, a person forgets to add an @ sign to the EMAIL field, the "error message" will appear. The rest of the data will not be submitted until the person fills out the form correctly.
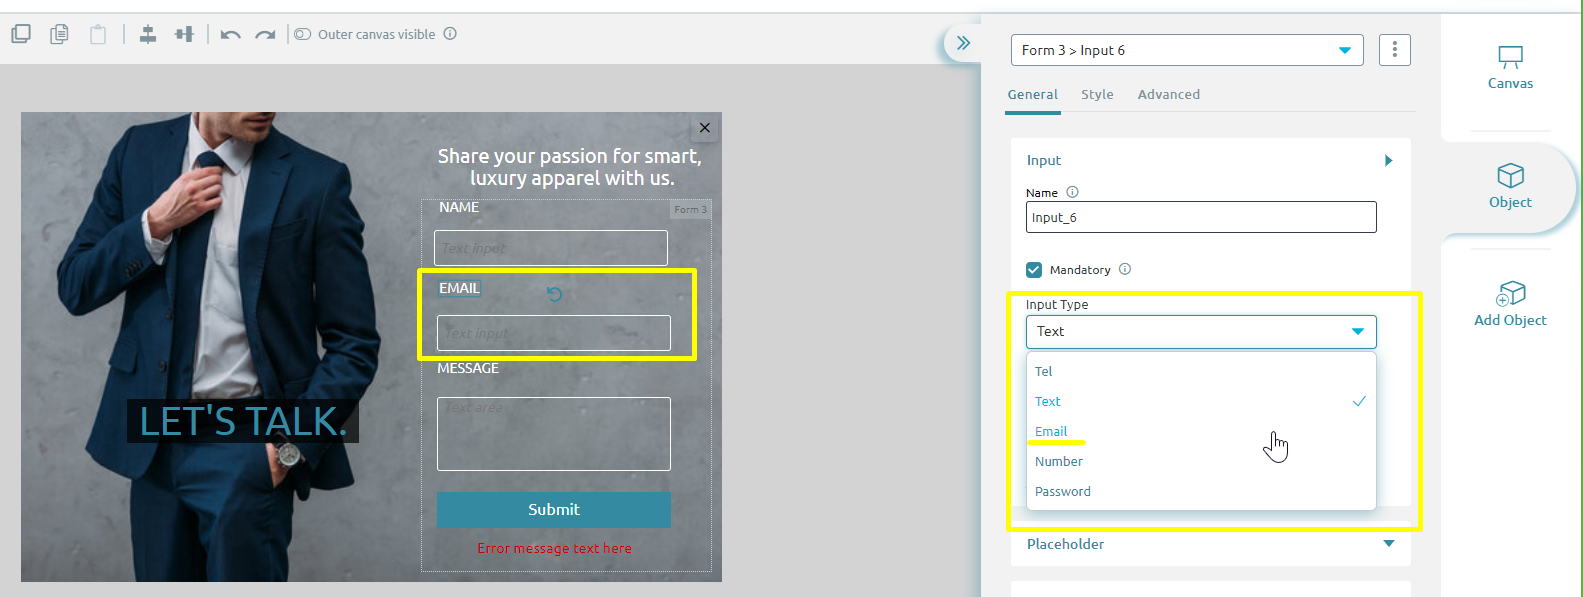
Image 8: Determine Input Type for Each Container
Step 7.2: MAKE SURE YOU MARK EACH RELEVANT INPUT AS MANDATORY
Obviously, in this case, each field is mandatory, and it is impossible to submit the form without filling in all of it. This might not be the case with questionnaires and more complex forms. Just keep in mind that it is possible to differentiate between mandatory and non-mandatory fields.
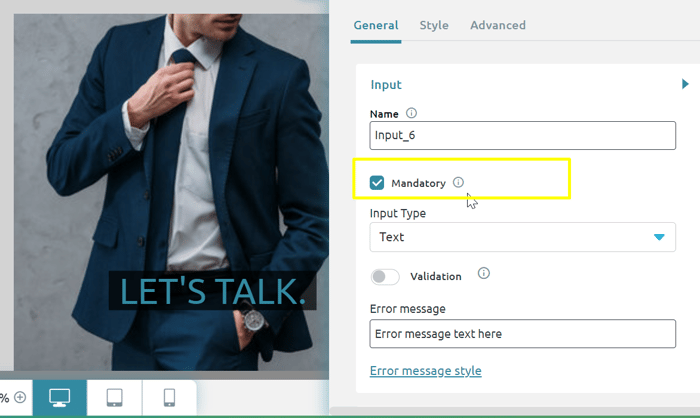
Image 9: Make Sure You Mark Each Relevant Input as Mandatory
Step 8: CLICK PREVIEW TO CHECK OUT WHAT THE WHOLE THING LOOKS LIKE
You can see the preview button to the top, right corner of the screen. Click "PREVIEW", and you'll get to see what the contact us form looks like on your website. If you are in any way unsure about what you're seeing, you can easily edit the form before it goes live.
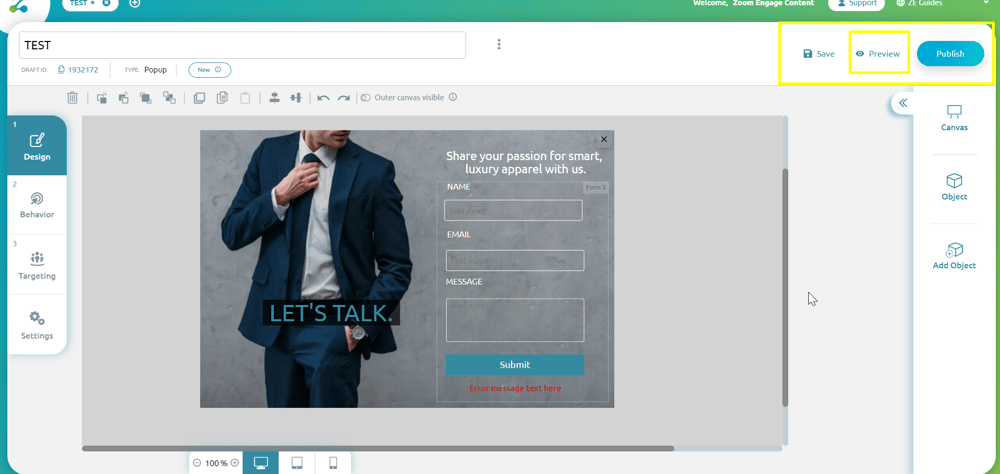
Image 10: Click Preview to See What The Form Would Look Like On Your Website
Why Your Contact Form Needs to be Flawless
A contact form is much more formal than a high-engagement Instagram post or a Twitter thread. Still, a contact us form is part of a larger narrative of communication; and it should be as tailored and accessible as possible.
In their recent research, Sprout Social surveyed over 1000 people to understand how brands can benefit from this desire for connection. What they came to understand is that the most successful way to establish a fulfilling relationship between a brand and a consumer is by making this connection a focal point. Build your brand up as a connector first, and a seller second.
If you are interested in building a strong relationship with your audience via a contact form a questionnaire, a regular popup or mobile widget campaign, and many other marketing solutions, feel free to schedule a demo with Zoom Engage. You'll get a chance to speak to a dedicated customer success manager, and build simple DIY campaigns such as this one with no coding knowledge. Additionally, you could leverage the coding knowledge of an experienced, technical team for more complex, dynamic content on your website. Good luck!